

There’s something oddly satisfying about clicking your way through files and projects with an actual mouse—especially if, in your day-to-day, you’re shackled to a laptop touchpad. The reality? Trackpads get the job done, sure, but there’s a reason so many people make the switch. A Dell wireless or Bluetooth mouse offers a level of precision that a trackpad rarely matches. Maybe it’s nostalgia, or maybe it’s muscle memory, but the difference can be night and day when you’re neck-deep in documents or image editing.

That said, that first connection can sometimes be a head-scratcher. Wires are gone, dongles are lost, and the friendly comfort of plug-and-play is replaced with options, buttons, and blinking lights. The silver lining? You don’t need a degree in computer science to get it working. Give yourself ten minutes (fifteen, if you get distracted searching for batteries), and you’ll be up and running. In this guide on how to connect dell mouse to laptop, we’ll walk you through the steps of connecting your new wireless mouse to your laptop so you can get back to scrolling and clicking in no time.
Identify Your Dell Mouse Type
Let’s start at the beginning. Before you go fumbling with settings or poking at random buttons, take a moment to figure out exactly what sort of Dell mouse you’re holding. Dell seems to enjoy giving you choices: there are those with a USB dongle that tucks into a port, and others that want nothing more than direct Bluetooth. If you’ve got a tiny wireless receiver in the box (or inside the battery compartment, Dell’s favorite hiding place), that’s your dongle. Plug it into your laptop—USB-A or USB-C, it doesn’t matter much, as long as there’s a port open.
Now, if you can’t find a dongle but see something labeled “Bluetooth” or spot a mysterious pairing button, your mouse is banking on your laptop’s built-in Bluetooth. Some of the fancier Dell models do both—dongle or Bluetooth, dealer’s choice. To be sure, check under the mouse or glance at the original packaging. You’re looking for “Bluetooth,” “2.4GHz wireless,” or, if you’re lucky, both.
What You Need Before Connecting
Prepare for a minor scavenger hunt. First, check that the mouse has batteries installed. Almost every Dell mouse takes AA or AAA batteries, and Dell sometimes includes them, sometimes not. Flip off the bottom cover, squint at those tiny polarity indicators, and put the batteries in the right way. Snap the lid back.
Next up: your laptop. If you’re using Bluetooth, double-check that your computer actually supports it. Don’t laugh—some older laptops quietly skipped Bluetooth. Open your system settings, find the Bluetooth panel, and make sure the feature is live. For the USB dongle type, free up a port. Some laptops only have USB-C, and those classic receivers are USB-A, so you might need an adapter—keep a hub handy if you often plug in other stuff too.
7 Not-Always-Simple Steps on How to Connect Dell Mouse to Laptop
Step 1: Power On Your Mouse and Check for Life
First things first: does the mouse turn on? Hunt for a small switch on the underside—usually, it flips toward something green or a tiny icon and reveals a sliver of color. Some mice have an LED indicator. If that glows or blinks green, the batteries are good for now. No light at all? Batteries may already be dead, or (much more likely) one is the wrong way round. If the LED flashes red or orange, well, that probably means “replace me.” Don’t ignore the warning; a fresh pair of AAs will save you grief later.

Step 2: Plug in the Receiver or Enter Bluetooth Mode
If you’re using a USB receiver, go ahead and pull it from the battery compartment if it’s been stashed there. Plug it straight into your laptop. Most modern operating systems notice new USB devices in seconds; some might take a bit longer if your machine’s busy juggling updates in the background.
For Bluetooth, the dance is a bit different. There’s usually a small button near the power switch—sometimes you’ll need a pen to reach it. Press and hold for a few seconds. Watch the indicator light: a rapid blink generally means the mouse is broadcasting and ready to pair. It’s that nervous, “pick me!” moment.
Step 3: Open Device Settings on Your Laptop
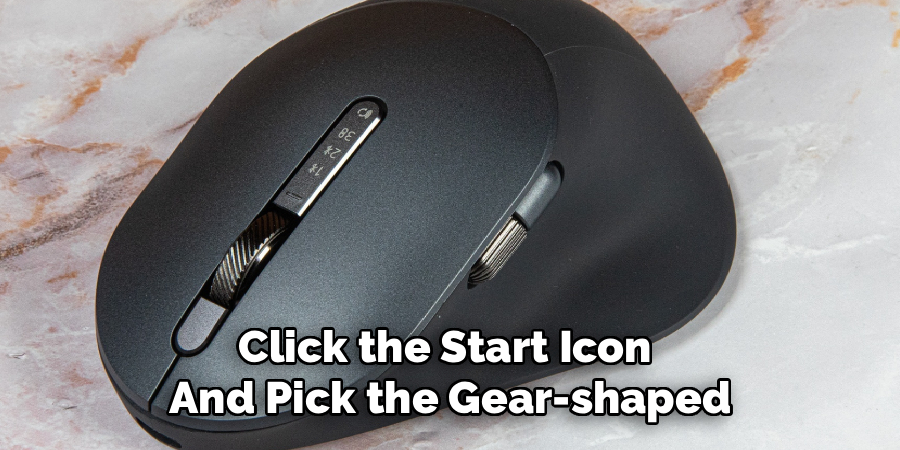
On Windows, click the Start icon and pick the gear-shaped settings button—that’s the control center. You’ll want the ‘Devices’ menu, then ‘Bluetooth & other devices’. That’s where all your connected gear shows up.
If you’re on macOS, click the Apple logo and open ‘System Settings’ (or ‘System Preferences’ for older versions). Click on ‘Bluetooth’. Make sure you’ve toggled Bluetooth to “On.” If you skip this, the mouse will never even get a shot at connecting.
Step 4: Start the Search
With your mouse powered—and within striking distance of your laptop—it’s time for the systems to talk (or at least try). On Windows, hit the “Add Bluetooth or other device” button at the top of the Devices menu, choose “Bluetooth,” and let Windows scan.
Macs are a bit more low-key. As soon as you open the Bluetooth window, your computer starts hunting for stray signals. There’s usually a spinning icon, and you might see nearby devices appear one by one. Keep the mouse close. Wireless clutter can sometimes interfere, even if it seems unlikely.
Step 5: Pick Out Your Mouse
Here’s where things can get crowded, especially if you live or work near other people using wireless gadgets. Wait for a device labeled “Dell Wireless Mouse,” “Dell WM126,” “Dell Mobile Pro,” or something similar. Select it. With luck, Windows or macOS will connect immediately. Occasionally, you’ll get asked for a PIN, but a regular mouse rarely needs this—still, having the manual nearby can’t hurt if the software insists.
If the light on the mouse switches to solid or stops blinking altogether, odds are you’re connected.
Step 6: Test Before You Trust
Before you close too many windows, give the mouse a try. Move it around; watch for the cursor to follow without lag or hesitation. Click the left and right buttons, scroll around. If the pointer appears sluggish, jumps, or does nothing, wireless interference or a poor surface may be the culprit. A dedicated mousepad can work wonders; glass tables rarely play nice with optical sensors. Better to find these hiccups now, before that big deadline creeps closer.
Step 7: Make the Mouse Truly Yours
Connection is only half the battle. Spend a minute tweaking settings—on Windows, the ‘Mouse’ panel lets you adjust cursor speed, swap button assignments (helpful for left-handed users), and finesse scroll speed. Mac users will find similar controls under ‘Mouse’ or ‘Trackpad’. For mice with extra buttons—especially Dell’s higher-end models—you can download ‘Dell Peripheral Manager’. With it, you assign shortcuts, fine-tune performance, and generally geek out. These tweaks might appear frivolous, but a few minutes invested here often pays real dividends in comfort and efficiency.

Following these steps on how to connect dell mouse to laptop, you can ensure a smooth and hassle-free experience while using your Dell mouse with your laptop. Additionally, it is important to regularly clean your mouse and its surface to maintain optimal performance.
Troubleshooting Connection Issues
Even with the best preparation, wireless mice sometimes refuse to cooperate. If your mouse is ignoring you (or keeps dropping its signal), don’t panic. Start with the obvious: change the batteries. If things are still dicey, remove the mouse from your laptop’s paired devices list and attempt the pairing process again; connections can get confused.
For USB models, try plugging the receiver into a different port—sometimes a crowded laptop controller causes miscommunication. From time to time, outdated Bluetooth or system drivers trip things up, so installing the latest updates isn’t a bad idea.
Performance Tips
For smooth operation, the surface matters more than you might suspect. Shiny or reflective tables—glass, magazine covers, or textured plastic—will almost always make the cursor jump and stutter. Stick to a cloth or rubber mousepad. Have a Bluetooth model? WiFi routers and wireless phones crowding your desk can create headaches, though only in some circumstances.
At the end of the day, flip off the mouse—it’s a small action, but over a year, it makes a significant difference in how often you’re hunting for batteries.
Cleaning and Maintenance
Think of your mouse like your favorite old pen—it works best when it’s clean. Before wiping it down, either unplug the receiver or turn the mouse off to avoid accidental clicks. A lightly damp microfiber cloth takes care of the frame and buttons; avoid using anything dripping wet (moisture and electronics are an unhappy pair).
For the sensor, gently circle a dry cotton swab around the lens area. Skip liquids entirely near the bottom. Over-cleaning won’t improve tracking, but neglect over months almost always gums things up.
Frequently Asked Questions
Q1: How do I Know If My Dell Mouse Is Bluetooth or a wireless USB?
A1: Flip the mouse over, or peek inside the battery compartment. Is there a little USB stick tucked in? That’s a dongle model. If not, but there’s a dedicated pairing button, chances are it’s Bluetooth. Some newer Dell mice blur the line and support both, so the presence of both a dongle and a tiny Bluetooth button means dual options.
Q2: Why Is My Dell Mouse Blinking Orange or Red?
A2: Blinking orange (sometimes red) nearly always signals low power. You’ll want to swap in fresh alkaline batteries—to avoid connection instability and mid-project frustration. Once you do, the indicator should glow green or white again.
Q3: Can I Connect My Dell Mouse to Multiple Devices?
A3: For entry-level models, the answer is “not without effort.” One laptop at a time; to switch, you’ll need to re-pair. However, Dell’s multi-device mice add a separate button, letting you jump between up to three connected devices instantly—no more setup rituals every time you swap laptops.
Elevate Your Daily Workflow
Perhaps “simple” isn’t quite the word, but connecting a Dell mouse is straightforward once you know what to expect. Identify the model, follow the steps without skipping, and dial in your settings. Paying a bit of attention to ongoing maintenance (and battery status) ensures this small investment in comfort won’t fail you during crunch time.
With luck—and a little care—your mouse will remain a trusty tool across all your computing adventures, both work and play. Thanks for reading this guide on how to connect dell mouse to laptop.

1 thought on “How to Connect Dell Mouse to Laptop”