

Furniture construction, at its core, is an exercise in physics. When we consider the humble dining table or a sprawling workspace desk, the intersection of horizontal and vertical planes dictates the object’s lifespan. Relying on basic fastening methods might seem sufficient for temporary setups. Yet, knowing how to attach table legs with bolts appears to offer a measurable advantage in structural longevity.
This guide explores the mechanical principles and practical steps required to secure your table base. By examining the methodology behind bolted joints, we can likely elevate a basic weekend project into an enduring piece of craftsmanship.

Why Bolted Joints Matter?
Bolted joints are widely recognized for their ability to create strong, durable connections between components. Unlike adhesives or simple screws, bolts distribute pressure evenly across the joint, reducing the likelihood of stress points that could lead to failure over time. This makes bolted joints particularly advantageous for furniture such as tables, where stability is critical for daily use.
Additionally, bolted connections allow for disassembly and reassembly, offering flexibility for repairs or modifications. By using bolts, you not only achieve greater structural integrity but also ensure that the table can withstand repeated use without losing its stability or shape.
The Case for Bolts Over Standard Screws
Screws have their place in casual woodworking. They rely on threads biting into the cellular structure of the wood, which is inherently vulnerable. Move a screwed-in table across a carpet a few times, and the fibers may begin to yield. Wood stripping becomes a tangible risk.
Bolts operate on a different mechanical premise. They either pass entirely through the substrate to meet a nut or they engage with a metal insert seated deeply within the grain. This distributes sheer forces across a wider surface area. The joint resists splitting. Furthermore, bolted hardware allows for indefinite cycles of disassembly—a practical necessity for large furniture navigating tight architectural spaces.
Identifying Compatible Table Legs
Not all table legs accommodate bolted connections naturally. Certain profiles are engineered specifically for this level of tension. Metal hairpin legs, for instance, frequently utilize a flat steel mounting plate. This plate usually features pre-machined holes that pair well with machine bolts and threaded inserts.
Heavy farmhouse legs might suggest a different approach. They often rely on hanger bolts. These hybrids feature wood threads on the upper shaft and machine threads below, interfacing with concealed corner brackets. Massive industrial bases almost entirely demand thick steel bolting to prevent lateral flex under dense slabs of oak or stone.
Gathering Your Workshop Materials
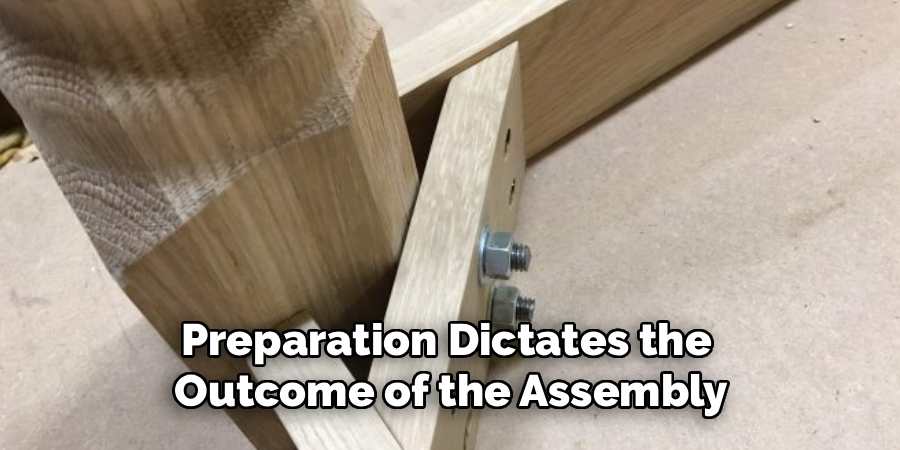
Preparation dictates the outcome of the assembly. You will need your primary components—the legs and the top—alongside precisely measured bolts, washers, and nuts. A power drill equipped with a sharp set of wood bits is non-negotiable for boring pilot holes. You should also source a wrench or socket set matching the hardware.
Precision tools matter. A tape measure, a carpenter’s pencil, and a framing square help mitigate alignment errors. If the design requires threaded inserts, an Allen key or specialized installation bit will be necessary to drive them below the surface plane.
7 Steps on How to Attach Table Legs With Bolts
Step 1: Mapping the Initial Placement
Gravity is unforgiving of asymmetrical placement. Rest your tabletop face down on a moving blanket to shield the finish. Using your square and measuring tape, map out the geometry. The legs need to be inset enough to allow knee clearance, yet pushed outward enough to distribute the center of mass. Mark the precise hole locations with a pencil. Using the leg’s mounting plate as a physical template might reduce the margin of error here.
Step 2: Boring the Pilot Holes
Driving hardware blindly into dense timber frequently results in catastrophic splitting. Pilot holes relieve that internal pressure. Choose a bit marginally narrower than your threaded insert’s outer diameter. To avoid breaching the top surface, wrap a flag of painter’s tape around the bit to serve as a physical depth gauge. Keep your hands steady. The drill must remain strictly perpendicular to the wood. Extract the bit frequently to clear fibrous waste, then vacuum the cavities.
Step 3: Seating the Hardware
Modern joinery often favors threaded wood inserts. Their coarse external threads grip the wood, while the internal cavity provides clean machine threading. Drive these in slowly using an Allen wrench. They should sit perfectly flush.
If you are handling traditional wooden legs with hanger bolts, the process shifts slightly. You might lock two nuts onto the machine threads, using a wrench to drive the coarse end into the leg. Once seated, remove the nuts to expose the clean machine threads.
Step 4: Aligning the Components
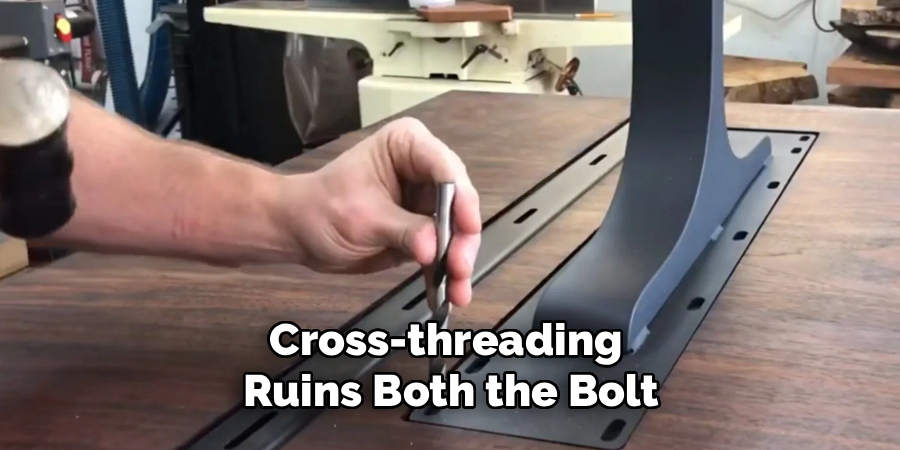
Bring the legs into proximity with your prepared holes. Metal plates dragged carelessly across varnished wood will leave permanent scars. Lift, do not slide. Check the orientation. Tapered or angled legs must face their intended directions. If the alignment feels slightly off, avoid forcing the hardware. Cross-threading ruins both the bolt and the insert simultaneously.
Step 5: Initiating the Thread Engagement
Drop a washer onto every bolt. This simple disc spreads compressive force, preventing the bolt head from deforming the mounting plate under high torque. Begin threading by hand. Fingers offer tactile feedback that wrenches simply blot out. Turn each bolt clockwise until it catches smoothly. If resistance feels gritty or premature, back it out and reset your angle.
Step 6: Applying Final Torque
Once hand-threaded, reach for the socket set. Avoid tightening one bolt completely while others sit loose. Employ a diagonal tightening sequence—much like mounting a car tire. This draws the plate down evenly, preventing binding. Tighten until resistance becomes firm. Over-torquing may extract the insert from the wood fibers entirely. A modest quarter-turn past snug is usually sufficient.
Step 7: The Structural Assessment
Flip the piece upright. For heavy slabs, recruit assistance to prevent placing lateral stress on the joints mid-rotation. Rest the table on its feet and evaluate the geometry. Press firmly on the surface. Try to induce a wobble. A properly bolted joint should respond like a single, solid object. If lateral movement occurs, re-evaluate floor leveling or re-torque the hardware lightly.
Following these steps on how to attach table legs with bolts, a structural assessment should be done to ensure the stability of the table. This includes checking for any potential weak points or areas of concern. It is important to make sure that the table can withstand weight and movement without compromising its structure.
Anticipating Common Structural Failures
Neglecting pilot holes remains a primary source of ruined material. Without an expansion channel, wood splits. Over-tightening represents a secondary, equally destructive habit. It tears the threads out of the substrate.
Omitting washers might seem harmless, but metal grinding against metal eventually introduces slack into the joint.
Long-Term Maintenance Considerations
Wood behaves dynamically. It absorbs ambient humidity and sheds it, expanding and contracting with the seasons. This microscopic movement can gradually loosen threaded connections.
Re-evaluating the torque every twelve months may extend the table’s lifespan. If a specific fastener chronically retreats, a mild thread-locking compound could stabilize it without preventing future dismantling.
Frequently Asked Questions About Table Assembly
Q1: Do Standard Screws Work for Miniature Tables?
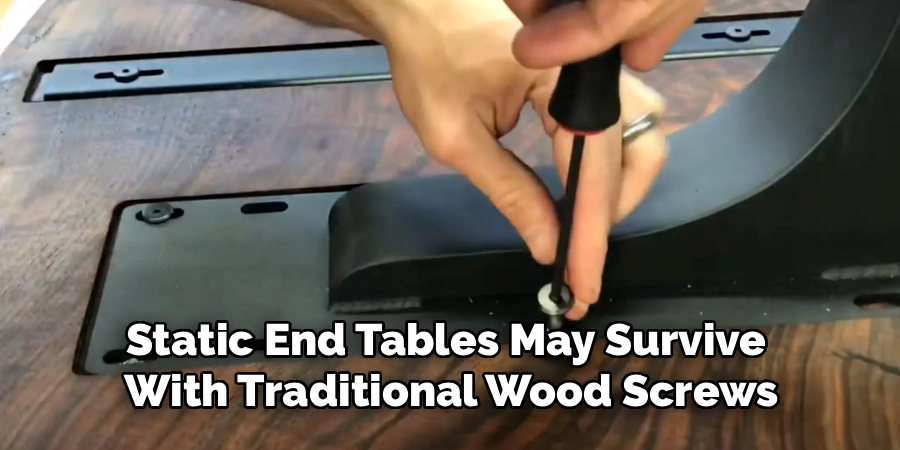
Small, static end tables may survive with traditional wood screws. However, sheer forces generated by foot traffic or vacuum cleaners can still pull them free. Bolting provides a margin of safety that screws lack.
Q2: How Deep Should the Pilot Cavity Extend?
The bore should run slightly deeper than the hardware itself. If a bolt bottoms out against compressed wood dust, it risks fracturing the tabletop from the inside out. Use a depth stop.
Q3: Can a Stripped Wood Insert Be Salvaged?
A spinning insert is frustrating but fixable. Extract the hardware. You might pack the void with a hardening wood epoxy or glue in a hardwood dowel. Once fully cured, redrill the pilot hole and re-seat the insert.
Q4: How to Prevent Stripped Wood Inserts?
To prevent stripped wood inserts, it is important to use the correct size and type of insert for the material you are working with. It is also helpful to apply a small amount of lubricant, such as wax or oil,l to the insert before installation. This will make it easier to screw in and reduce the risk of stripping.
Q5: Are There Any Alternatives to Wood Inserts?
Yes, there are alternative types of inserts that can be used in place of wood inserts. Some options include metal threaded inserts, plastic threaded inserts, and self-tapping screw-in inserts. These alternatives may have different installation methods and may be better suited for certain materials or applications. It is important to research and choose the best type of insert for your specific project.

Final Thoughts on Structural Joinery
Integrating bolts into your furniture assembly marks a distinct transition in methodology. You move away from temporary fixes toward enduring construction. The holding power of machine threads and structural inserts virtually eliminates the instability associated with aging furniture.
By applying these specific techniques, your custom tables and desks may very well outlast their original purpose. Thanks for reading this guide on how to attach table legs with bolts.
