

Bringing a new piece of technology into your home or office should make your life easier, not more complicated. Many people unbox their brand new printing device only to feel overwhelmed by the setup process and all the cords involved. We understand that configuring network devices can seem like a daunting task for beginners. However, figuring out how to connect brother printer to wifi is a straightforward process that anyone can master with a little guidance.
By removing the need for cumbersome USB cables, you open up a world of flexible document management for your entire household or office team. You can place the machine anywhere in your building while maintaining a perfect connection to all your computers and smartphones. We will break down this technical process into simple, bite-sized actions that require zero background in information technology. You just need your device, your local network details, and a few minutes of patience to complete the configuration.
Why Going Wireless Transforms Your Printing Experience
Choosing a wireless setup over a traditional wired connection fundamentally changes how you interact with your office equipment. Traditional setups require your computer to sit within a few feet of the machine, severely limiting your room layout and interior design options. A wireless configuration allows you to tuck the machine away in a closet, a corner, or a dedicated supply room out of sight. You get to reclaim valuable desk space while keeping your workstation clean and free from messy cable clutter.
A wireless connection also allows multiple users to share a single device effortlessly without swapping cables back and forth. Every laptop, desktop, tablet, and smartphone on your local network can send documents to the machine simultaneously. This shared accessibility saves you significant money since you only need to purchase and maintain one central unit for the entire family or office staff. You eliminate the cost of buying duplicate hardware or individual ink cartridges for separate workstations.
Step-By-Step Guide To How to Connect Brother Printer to WiFi
Step 1: Gather Your Essential Network Information
Before you even touch the printing machine, you need to collect your specific network credentials. You must know your exact network name, often referred to as the SSID, and your secure network password. Your internet service provider usually prints this critical information on a sticker located on the back or bottom of your internet router.
Write these details down on a piece of paper so you have them ready when the machine prompts you. Ensure you pay close attention to uppercase letters, lowercase letters, and special characters in your password. Having this information prepared prevents you from rushing around the house trying to find your router during the setup sequence.
Step 2: Power On Your Device
Proper initial hardware initialization ensures the internal network card functions correctly during the pairing process. Plug the main power cord directly into a reliable wall outlet rather than a crowded power strip to guarantee a stable electrical current. Press the physical power button on the front control panel and wait for the initialization sequence to complete fully.
You will hear the internal motors spinning and see the digital display screen light up with the brand logo. Do not press any additional buttons while the machine warms up and calibrates its internal components. Once the home screen appears steady and the mechanical noises stop, your device is fully prepared for the network pairing procedure.
Step 3: Access The Main Control Panel Settings
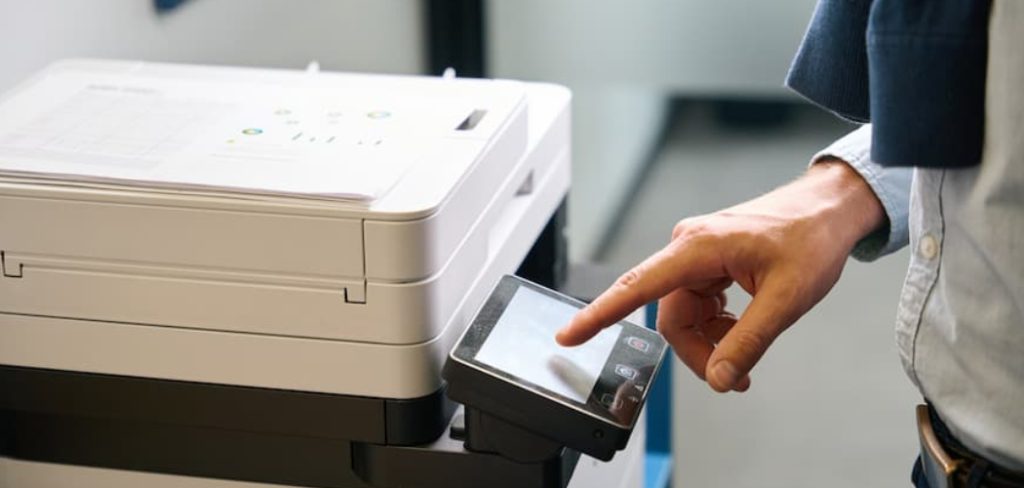
Navigating the digital interface of your machine is incredibly intuitive once you understand the basic menu layout. Look at the touchscreen or use the physical arrow keys to locate the main settings icon, which usually looks like a small wrench or gear. Press this icon to enter the primary configuration menu where all the hardware controls live.
Scroll through the available options until you find the specific menu labeled for network or wireless settings. Select this option to open the connectivity submenu, which houses all the tools needed to establish your connection. Take your time pressing the buttons to avoid accidentally selecting the wrong configuration tool from the list.
Step 4: Launch The Wireless Setup Wizard
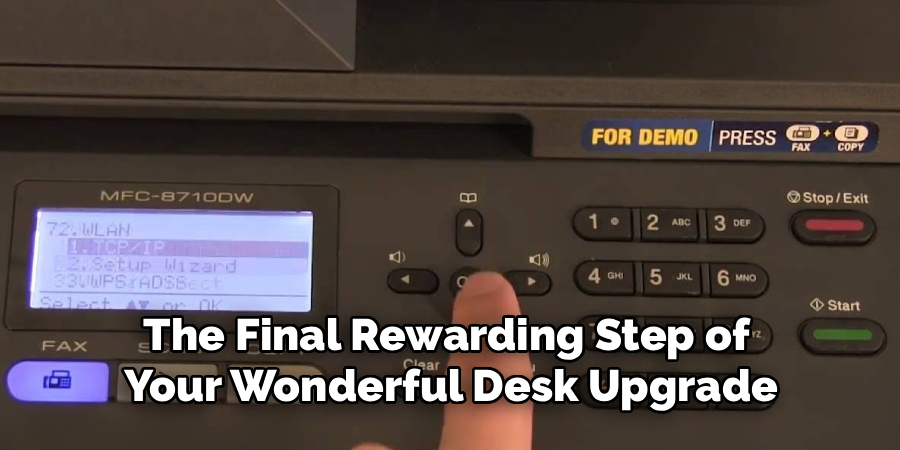
The built-in configuration tool does most of the heavy lifting for you during the installation process. Inside the network menu, look for an option titled setup wizard or wireless setup wizard and select it to begin. The machine will immediately activate its internal antenna and start scanning the surrounding area for available internet signals.
This scanning process typically takes a few moments to detect all the routers broadcasting in your immediate vicinity. Make sure your home router is turned on and functioning normally while the machine conducts this local area search. You will soon see a populated list of nearby networks appear directly on your digital display screen.
Step 5: Identify And Select Your Local Network Name
Review the list of available networks carefully to find the specific name you wrote down earlier. Use the directional arrows to scroll down if you live in a dense neighborhood with many visible signals. Once your specific network name highlights on the screen, press the okay button to lock in your selection.
If your network name does not appear on the first scan, you may need to move the machine closer to your router temporarily. Sometimes thick walls or large metal appliances block the wireless signal from reaching the internal antenna. Simply move the device, cancel the current search, and restart the wizard to refresh the list of available connections.
Step 6: Input Your Secure Network Password
Entering your secure password requires careful attention since the digital keypad can be slightly tricky for beginners. Use the touchscreen or the physical directional arrows to select each individual letter or number in your secret phrase. Most devices require you to press a specific button to toggle between uppercase letters, lowercase letters, and special symbols.
Take your time entering each character because a single mistake will cause the connection attempt to fail entirely. Once you input the final character of your password, press the confirmation button to submit the credentials to your router. The machine will display a connecting message while it attempts to authenticate your digital handshake with the router.
Step 7: Confirm Settings
After the authentication process finishes, the machine will display a success message indicating a positive connection. The digital screen typically returns to the main menu, and a small wireless icon will illuminate to show active signal strength. This solid indicator light serves as visual proof that your hardware successfully joined your local environment.
If the connection fails, the machine will print a brief error report explaining what went wrong during the handshake. Usually, a failed connection simply means you mistyped the password during the previous input stage. Just run the wizard again and type your credentials slightly slower to ensure absolute accuracy.
Frequently Asked Questions
What Should I Do If My Device Cannot Find The Network?
A failure to detect your specific signal usually indicates a simple distance or interference problem. Try moving the machine into the same physical room as your internet router just for the initial setup phase. You must also ensure your router is broadcasting a standard two-point-four gigahertz signal, as some older office machines cannot detect five-gigahertz bands. Restarting your router completely can also refresh the broadcast signal and resolve basic detection issues.
Does My Computer Need To Be Connected With A Cable First?
You absolutely do not need a physical cable to configure a modern machine with a built-in display screen. The entire authentication process happens directly on the hardware control panel using the built-in setup wizard. The only time you might need a temporary cable is if you own an older model that lacks a digital display entirely. For most current devices, you can complete the entire process completely cord-free from start to finish.
Why Is My Password Not Working During Setup?
Password authentication failures almost always stem from minor typographical errors during the input phase. Remember that network credentials are strictly case-sensitive, meaning a capital letter must be entered exactly as a capital letter. Pay special attention to characters that look similar, such as the capital letter O and the number zero. Take your time toggling through the character sets on the control panel to ensure you select the exact right symbol.
Can I Print From My Smartphone After Setup?
Your newly configured device is fully capable of receiving documents directly from your mobile smartphone or tablet. You simply need to download the official mobile application provided by the manufacturer from your device application store. Ensure your smartphone is connected to the exact same wireless network as your office machine before opening the application. The mobile software will automatically detect the hardware and allow you to send photos or documents instantly.
What Happens If My Router Restarts?
Your office machine contains built-in memory that securely stores your specific network credentials even when the power goes out. If your internet router restarts or you experience a brief electrical outage, the machine will automatically reconnect once the signal returns. You do not have to run the setup wizard again unless you physically replace your router or change your main password. The device will patiently scan the area and reestablish the handshake the moment your router comes back online.
Conclusion
Taking the time to modernize your office layout with a cord-free setup dramatically improves your daily productivity. You now have the freedom to position your hardware perfectly while enabling seamless document sharing across all your household or office computers. Now that you understand how to connect brother printer to wifi, you can confidently manage your own technological environment without hiring outside help. Grab your network credentials right now, power on your machine, and enjoy the incredible convenience of wireless document management today.
