

Are you looking for ways to replace the battery in your ADT motion sensor? Look no further!
Your home security system works constantly to keep your family safe. But what happens when the very devices protecting you run out of power? A low battery in your ADT motion sensor can compromise your entire security network, leaving vulnerable blind spots in your home. You do not need to wait for a technician or fumble through a mobile app to fix this issue.

This complete guide on how to change battery in ADT motion sensor will walk you through the manual process of swapping out your ADT motion sensor battery, ensuring your home stays protected without missing a beat.
What are the Benefits?
Handling your own battery replacements comes with several distinct advantages. First, you save money by avoiding costly technician service fees for a job that takes only minutes. Second, you restore your home’s security immediately, rather than waiting days for an available service appointment. Third, learning this simple maintenance routine gives you confidence and a better understanding of how your home security hardware operates. Finally, manually changing the battery without relying on the mobile app ensures you can maintain your system even if your internet connection drops or your phone is unavailable.
What Will You Need?
Before you begin, gather the necessary supplies to ensure a smooth process. You will need:
- A replacement battery
- A small flathead screwdriver
- A step stool or a small ladder
- Your master control panel code
10 Easy Steps on How to Change Battery in ADT Motion Sensor
Step 1: Put Your System in Test Mode
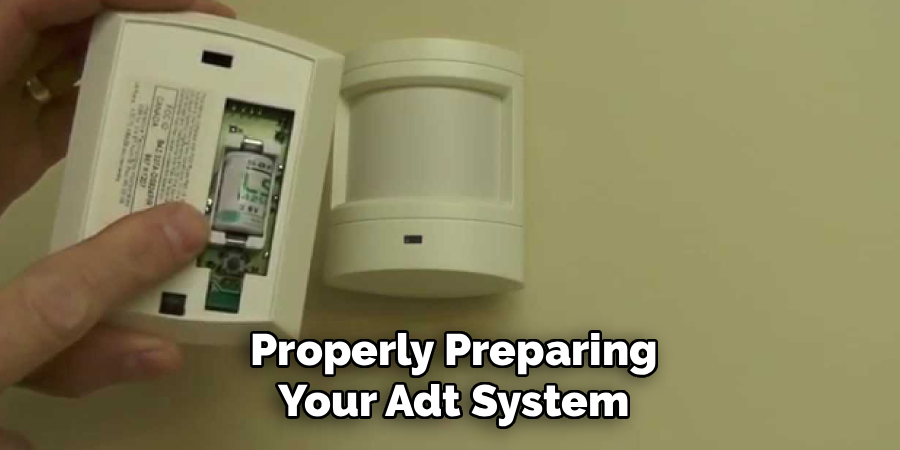
Properly preparing your ADT system is essential before any maintenance. Locate your main control panel and enter your master code to access the menu. Look for the “Test Mode” option, which ensures that the monitoring center is notified that you’ll be working on the system and suppresses any emergency responses. Not only does this prevent accidental false alarms, but it also signals to others in the household that you’re working on the security hardware. If your system is monitored by an external service, consider calling them directly to confirm test status—this double-check brings extra peace of mind.
Step 2: Locate the Target Motion Sensor
Examine your keypad display to identify which sensor needs a new battery. It may show a specific zone or room name, making identification straightforward. Walk around your home and visually confirm the exact sensor indicated, especially since large homes may have multiple sensors in one area. Scan the sensor and surrounding area for obstructions such as tall furniture, curtains, or decorations. Remove anything that might block access. Ensure you have secure footing before working at height—if needed, ask someone to steady your ladder or stool as a safety precaution.
Step 3: Remove the Sensor from the Mount
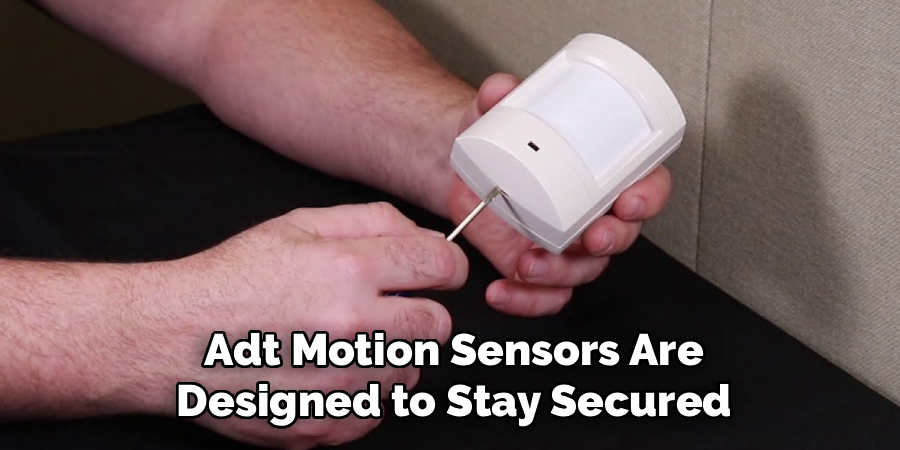
ADT motion sensors are designed to stay secured, so take your time during removal. Locate the release tab on the mounting bracket—these tabs can be top, bottom, or side-mounted, depending on the sensor model. Use your finger, but if resistance is high, use your small flathead screwdriver to gently leverage the tab. Avoid using excessive force to prevent snapping the plastic. Some sensors have slide-and-lift mechanisms, so review your device’s manual or inspect closely to spot the mounting style. Gentle, steady pressure typically prevents accidental damage.
Step 4: Open the Sensor Casing
Hold the sensor securely in both hands and look for a small notch or indent along the seam where the two halves of the casing connect. Insert your flathead screwdriver into this notch, twisting gently until the casing separates. Work slowly and evenly around the sensor edge to prevent cracking the plastic. Set the removed casing half aside in a safe spot, away from potential falls. Inspect the inside of the case for any dust or cobwebs—if present, wipe away gently, as debris could hinder contact points or the battery compartment.
Step 5: Identify the Old Battery
Take note of the make and model of the installed battery to ensure an exact replacement. Most ADT sensors use the CR123A lithium battery, but physically check for confirmation—older sensors can sometimes differ. Observe the direction of the battery, paying attention to positive (+) and negative (-) symbols marked both inside the compartment and on the battery itself. Snap a quick photo for reference if you’re unsure, so you have a memory aid when inserting the new power cell.
Step 6: Remove the Dead Battery
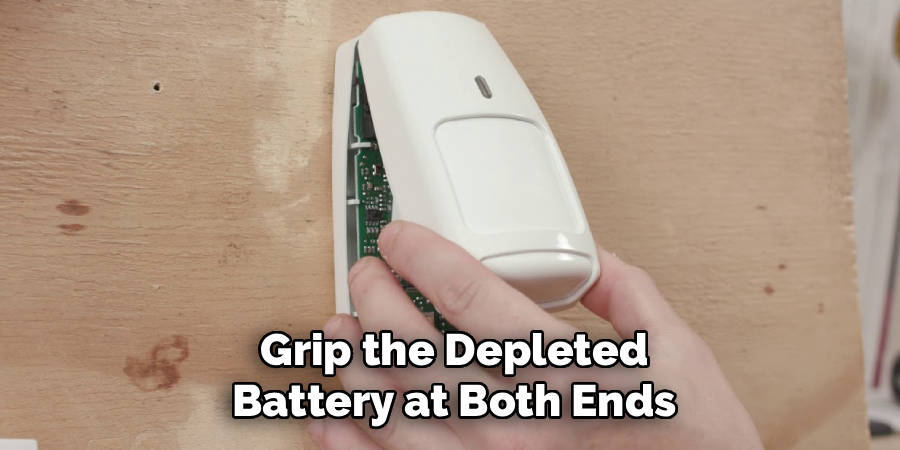
Grip the depleted battery at both ends, using your thumb and forefinger to gently rock it loose from the contacts. If it’s snug or firmly clipped, nudge it free using the flat edge of your screwdriver, again applying minimal pressure away from the sensitive parts of the circuit board. As soon as the battery is loose, dispose of it responsibly—lithium batteries must not be thrown in regular household trash, so set the old battery aside for proper recycling.
Step 7: Wait a Few Minutes
This step is often overlooked but highly beneficial. By waiting a minute or two after removing the battery, you allow all residual current to leave the system. This “reset” helps the motion sensor’s firmware recognize the new battery as soon as it’s installed. If you suspect the sensor has ever malfunctioned or failed to communicate, leaving it empty for up to five minutes can be beneficial for a deep reset. Use this waiting time to inspect the interior for corrosion, dust, or spider webs, and clean if necessary.
Step 8: Insert the New Battery
With the orientation of the battery fresh in your mind (or photo), take your new CR123A cell and align it perfectly with the polarity markings inside the compartment. Push the battery gently but firmly into the slots until it clicks into place. Ensure it sits flat and snug—loose connections lead to unreliable performance. If you feel resistance, double-check for misalignment, debris, or bent contacts before continuing. Replacing the battery correctly the first time prevents unnecessary repetition and keeps your sensor functioning reliably.
Step 9: Close the Casing and Remount
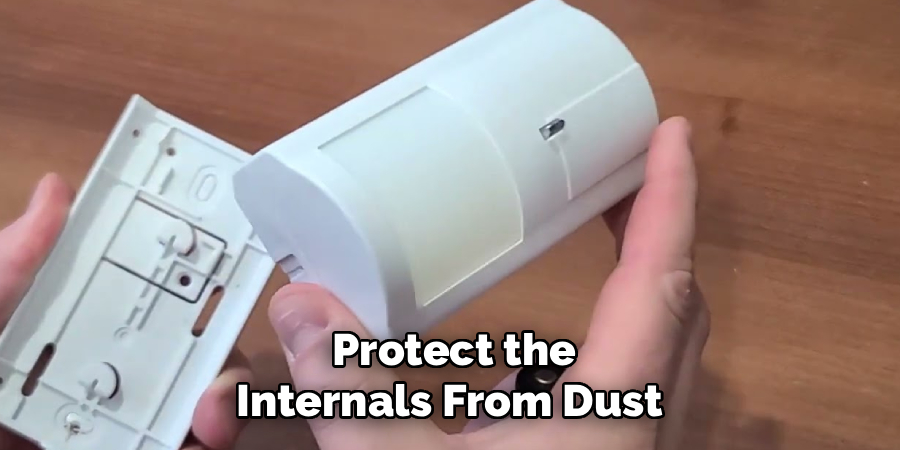
Once the battery is in place, fit the two halves of the casing back together. Squeeze until you hear or feel a click at each locking point, ensuring the case forms a tight seal to protect the internals from dust or tampering. Then, position the sensor back onto its bracket—carefully line up the grooves and attachments before gently sliding or snapping it into place. Be patient to get a secure fit. After mounting, give the device a slight tug to confirm it’s properly locked on and won’t come loose over time.
Step 10: Clear the Error and Test
Return to your control panel. Address any “Tamper” or “Low Battery” warnings that appear on-screen by entering your master code or following prompts to acknowledge and clear errors. Deactivate test mode and reactivate your security system. Walk past the motion sensor and observe its behavior—the small LED light should blink or the control panel should register activity, indicating successful communication. For added assurance, trigger a test alarm or alert and ensure all notifications appear as expected, proving your repair’s effectiveness. If issues persist, consult your manual or contact ADT support for remote troubleshooting.
These thorough steps and careful tips ensure your battery change process is smooth, safe, and successful every time.
5 Things You Should Avoid
- Skipping Test Mode: Never open a sensor without disarming and testing your system, or you will trigger a loud siren and a police dispatch.
- Touching the Circuit Board: Keep your fingers away from the internal electronic components to prevent static discharge from ruining the device.
- Using Cheap Batteries: Always purchase high-quality, name-brand lithium batteries to ensure long-lasting performance and prevent dangerous acid leaks.
- Forcing the Plastic: Never use excessive force to rip the sensor off the wall or pry the case apart, as the plastic tabs break easily.
- Installing Batteries Backward: Reversing the positive and negative ends will keep the sensor offline and can potentially short out the internal hardware.
Frequently Asked Questions
- How Often Do I Need to Replace the Battery in My Motion Sensor?
Under normal conditions, a high-quality lithium battery in an ADT motion sensor lasts between three and five years. The exact lifespan depends heavily on how often the room sees movement and how frequently the system is armed. High-traffic areas drain the power supply significantly faster than unused guest rooms. Your keypad will always alert you well before the battery dies completely. You should swap the battery within a week of seeing the low power warning. - Will My Alarm Sound if I Open the Sensor Casing?
Yes, opening the plastic casing will instantly trigger the system’s tamper switch. If your system is actively armed, the main siren will sound, and the monitoring center will receive an alert. This is exactly why you must put your main control panel into test mode before touching the hardware. As long as the system is in test mode, the tamper switch will simply log an event without sounding the alarm. You can easily clear this alert later using your master passcode. - What Specific Type of Battery Does the ADT Motion Sensor Use?
The vast majority of standard wireless ADT motion sensors require a single 3-volt CR123A lithium battery. These are small, thick, cylindrical batteries commonly used in high-drain devices like cameras and tactical flashlights. Some older or highly specific models might use AA batteries or CR2 variants instead. You should always open the sensor and check the existing battery type before making a trip to the hardware store. Using the wrong voltage will prevent the sensor from functioning properly.
Conclusion
How to change battery in ADT motion sensor does not require technical expertise or expensive service calls.
By following these straightforward steps, you can easily change your ADT motion sensor battery and keep your home protected. Remember to always prioritize safety by putting your system in test mode and handling the internal components with care.
Stay proactive with your system maintenance, and your security sensors will continue to guard your home reliably for years to come.

About
Alexis Kerr is a distinguished figure in the world of professional workspace optimization, with a decade of expertise creating innovative and ergonomic office environments. Her professional focus lies in merging organizational psychology with modern spatial design, fostering office setups that are both high-performing and employee-centric. As the lead author for Deskvity, Alexis Kerr delves into the art and science of corporate aesthetics and functionality, inspiring office managers and remote professionals alike.
Education Cornell University
(Ithaca, New York) Bachelor of Science in Design and Environmental Analysis Focus on human factors, workplace strategy, and sustainable interior environments. Gained extensive experience in how physical space influences productivity and mental clarity.
Savannah College of Art and Design (SCAD)
(Savannah, Georgia) Master of Fine Arts in Interior Design Specialized in commercial workspace solutions with a focus on blending digital integration with physical comfort. Participated in high-level industry projects to refine the balance between corporate branding and architectural utility.
Publications and Impact
In Deskvity, Alexis Kerr shares her insights on modern workspace trends, acoustic management, and strategies for efficient layout planning. Her writing bridges the gap between high-level architectural theory and practical day-to-day office needs, making it a must-read for both facility directors and individual professionals looking to elevate their work environment.