

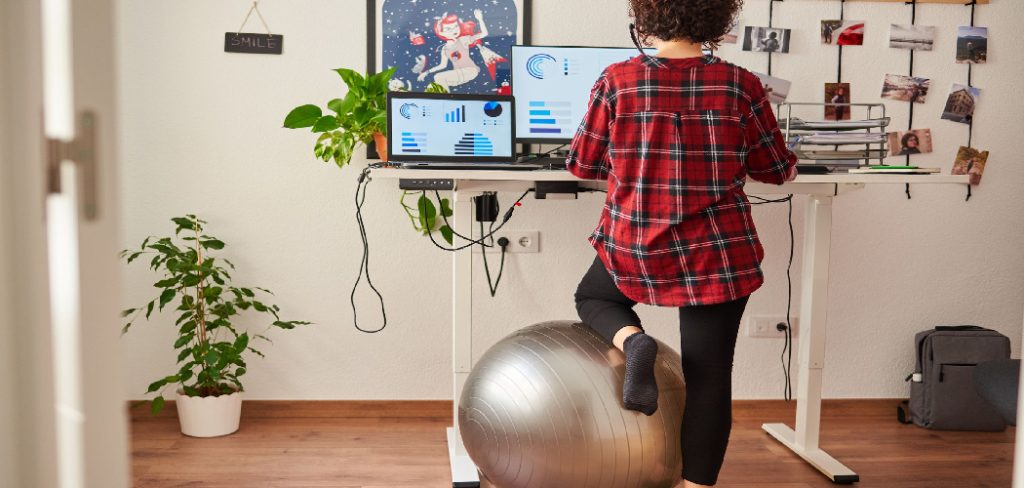
A stuck standing desk quickly turns an ergonomic workspace into a frustrating obstacle. When your adjustable desk stops responding or throws an error code, you do not need to panic or call for an expensive repair.
Most electric desks simply need a quick system reset to get the motors communicating properly again. Power surges, uneven loads, and accidental cord pulls can easily disrupt the internal sensors.
This complete guide on how to reset standing desks will walk you through the exact process to reset your desk and get you back to working comfortably. You will learn the benefits of resetting your desk, the simple tools you need, ten easy steps to perform the reset, and crucial mistakes to avoid.
What are the Benefits of a Reset?
Resetting your standing desk does more than just fix a temporary glitch. A proper reset recalibrates the internal sensors, ensuring the legs move up and down at the same speed. This prevents permanent motor damage caused by uneven lifting. Regular resets also clear out minor software bugs in the control box, allowing your memory presets to function accurately. By performing this quick maintenance task, you extend the lifespan of the motors, protect your warranty, and guarantee your desk remains a reliable tool for your posture and productivity.
What Will You Need?
You do not need any special tools or mechanical expertise to perform this task. You simply need:
- Clear access to the wall outlet powering your desk
- At least two feet of space below the desk
- The original power cable
- A flashlight (if your control box is hidden in a dark corner under the desktop)
10 Easy Steps on How to Reset Standing Desks
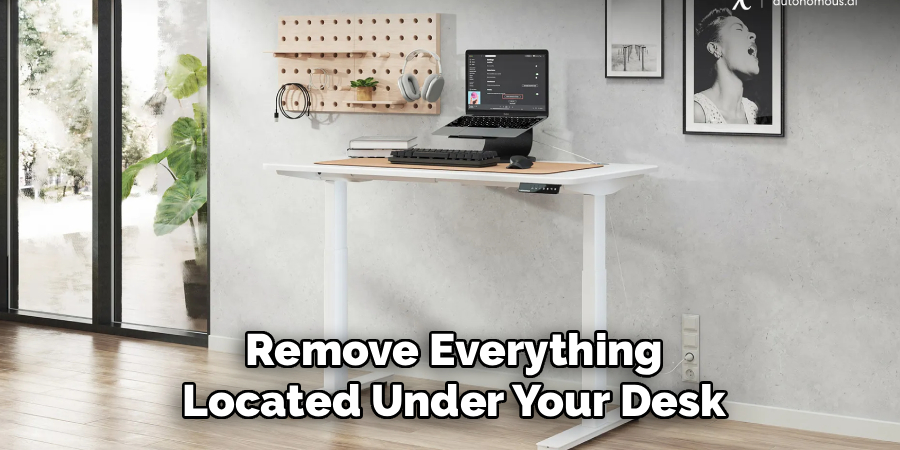
Step 1: Clear the Space Beneath Your Desk
Before you begin the reset procedure, you must remove everything located under your desk. Move any filing cabinets, trash cans, computer towers, or rolling chairs completely out of the way. During the reset process, the desk will travel down to its absolute lowest physical point. If an object blocks the descent, the anti-collision sensors might trigger, which will instantly interrupt the reset. Clearing the area guarantees a smooth path for the desk frame and prevents accidental damage to your office equipment or the desk motors.
Step 2: Unplug the Main Power Cable
Locate the main power cord that connects your desk to the wall outlet or power strip. Pull the plug out of the socket completely. Removing the power source forces the control box to shut down entirely, clearing the temporary memory that might be holding onto a false error code. Make sure you unplug the main cable from the wall rather than just unplugging the short cable connecting the keypad to the control box. Total power loss is essential for a true hard reset of the internal computer.
Step 3: Wait for a Full Minute
Patience is highly important during this step. After unplugging the desk, wait for at least sixty seconds before proceeding. The control box contains internal capacitors that store electrical charge. Even after you pull the plug, these components hold onto power for a short duration. Waiting a full minute allows the remaining electricity to drain completely. If you plug the desk back in too quickly, the system might not register the power cycle, and you will find yourself dealing with the exact same error code.
Step 4: Reconnect and Verify the Cords
After waiting for a minute, plug the main power cable firmly back into the wall outlet. Now, take a moment to look under the desk and verify all the other connections. Check the thick cables running from each motorized leg into the central control box. Ensure the thin cable connecting your digital keypad to the control box is also pushed in securely. Sometimes, a loose cable is the actual reason the desk stopped working. Pressing firmly on each connection ensures the electrical signals can travel properly once the reset begins.

Step 5: Wake the Keypad Display
If your desk features a digital display that goes to sleep to save power, tap any button once to wake it up. You need the screen to be active so you can monitor the reset progress and see any codes that appear. Some desks will flash an error like “RST”, “E08”, or simply show the current height. Even if your keypad only has simple up and down arrows without a screen, pressing the down button once prepares the internal relay switches for the calibration process you are about to start.
Step 6: Press and Hold the Down Button
Place your finger on the down button (or the arrow pointing downward) and press it firmly. Keep holding this button without letting go. You must maintain continuous pressure for the entire duration of the next few steps. If your finger slips off the button even for a second, the reset protocol will immediately abort, and you will have to start over from the beginning. Consistent pressure tells the control box that you are intentionally commanding a system override rather than just adjusting the height normally.
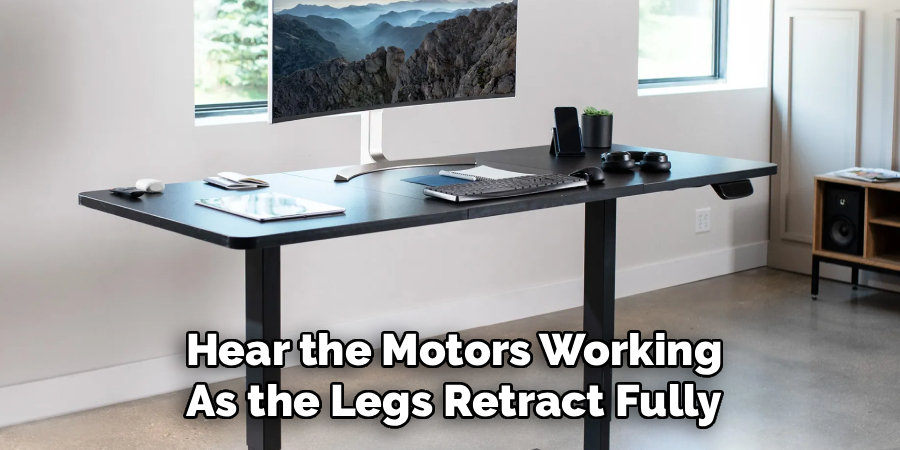
Step 7: Lower the Desk Completely
As you hold the down button, the desk will begin to descend. Allow it to travel all the way to its lowest possible physical height. You will hear the motors working as the legs retract fully. It is completely normal if the desk moves slightly slower than its usual operating speed during this phase. Do not panic if one side seems to hit the bottom a fraction of a second before the other; the entire purpose of this descent is to bring both legs to a shared baseline level so they can sync up again.
Step 8: Hold Until the Reset Confirmation
Once the desk hits the absolute bottom, it will stop moving. Do not release the down button yet. Continue holding it for another five to ten seconds. You are waiting for a specific confirmation signal from the desk’s computer. Most modern desks will emit a distinct audible beep. Others will show a flash on the digital display, or the desk will make a quick “dip” movement—dropping slightly and bouncing back up half an inch. This dip or beep is the system’s way of confirming that the internal calibration is successfully finished.
Step 9: Test the Upward Movement
Now that you have received the confirmation signal, you can release the down button. Test the success of your reset by pressing the up button. Hold it down and watch the desk rise. It should move smoothly and evenly upward without any stuttering or unusual grinding noises. Raise it to a standard standing height to ensure the lifting columns are perfectly synchronized. If the desk glides up effortlessly and the display shows the correct height measurement, your basic reset is complete.
Step 10: Reprogram Your Memory Presets
Because a hard reset clears out temporary memory, your favorite saved heights might have been wiped out. Lower the desk to your preferred sitting height, then press the save button (often labeled ‘M’ or ‘S’) followed by the number ‘1’. Raise the desk to your perfect standing position, press save, and select number ‘2’. Taking two minutes to reprogram these presets right now saves you from annoying adjustments during your workday. Your desk is now fully restored and optimized for comfortable use.

5 Things You Should Avoid
- Ignoring Weight Limits: Never attempt a reset while heavy monitors or equipment exceed the desk’s maximum lifting capacity.
- Releasing the Button Too Early: If you let go of the down button before the final beep or dip, the legs will remain uncalibrated.
- Using a Power Strip With a Low Surge Rating: Plug the desk directly into a wall outlet during the reset to ensure a steady power draw.
- Ignoring Physical Obstructions: Never force the desk down if you hear it hitting something; always clear the area first.
- Spilling Liquids Near the Control Box: Keep water bottles far away from the keypad and central box while you test the motors.
Frequently Asked Questions
- Why Does My Desk Only Go Down and Not Up?
This happens when the desk goes into safety mode because it loses sync between the two motorized legs. The system disables the upward movement to prevent the desk from tilting and dropping your equipment. You must perform a full factory reset to recalibrate the baseline height. Once both legs hit the lowest point and sync up, the system will unlock the upward function. Following the standard reset procedure will fix this issue immediately. - How Often Should I Reset My Desk?
You do not need to reset your desk on a strict schedule unless it stops working. However, performing a reset once every six months serves as good preventative maintenance. This routine check keeps the lifting columns perfectly aligned and prevents long-term motor strain. It also clears any minor digital errors building up in the control box memory. If you experience frequent power outages, you might need to reset it more often. - What Does the Rst Code Mean on My Display?
The RST code literally stands for “Reset” and indicates that your desk requires immediate calibration. The control box throws this code when it detects a power surge, an uneven load, or a communication failure between the legs. The desk will lock all normal functions until you address the warning. You simply need to hold the down button until the desk bottoms out to clear the code. After the recalibration beep, the RST message will disappear.
Conclusion
Resetting a standing desk is a simple, straightforward process that resolves the vast majority of motor errors and keypad glitches.
By following these easy steps, you can quickly restore your workspace without waiting for technical support. Always remember to clear the space beneath your desk, hold the down button until you hear the confirmation beep, and avoid overloading the motors.
Bookmark this guide on how to reset standing desks so you can quickly fix your desk the next time an error code interrupts your workday.
About
Alexis Kerr is a distinguished figure in the world of professional workspace optimization, with a decade of expertise creating innovative and ergonomic office environments. Her professional focus lies in merging organizational psychology with modern spatial design, fostering office setups that are both high-performing and employee-centric. As the lead author for Deskvity, Alexis Kerr delves into the art and science of corporate aesthetics and functionality, inspiring office managers and remote professionals alike.
Education Cornell University
(Ithaca, New York) Bachelor of Science in Design and Environmental Analysis Focus on human factors, workplace strategy, and sustainable interior environments. Gained extensive experience in how physical space influences productivity and mental clarity.
Savannah College of Art and Design (SCAD)
(Savannah, Georgia) Master of Fine Arts in Interior Design Specialized in commercial workspace solutions with a focus on blending digital integration with physical comfort. Participated in high-level industry projects to refine the balance between corporate branding and architectural utility.
Publications and Impact
In Deskvity, Alexis Kerr shares her insights on modern workspace trends, acoustic management, and strategies for efficient layout planning. Her writing bridges the gap between high-level architectural theory and practical day-to-day office needs, making it a must-read for both facility directors and individual professionals looking to elevate their work environment.