

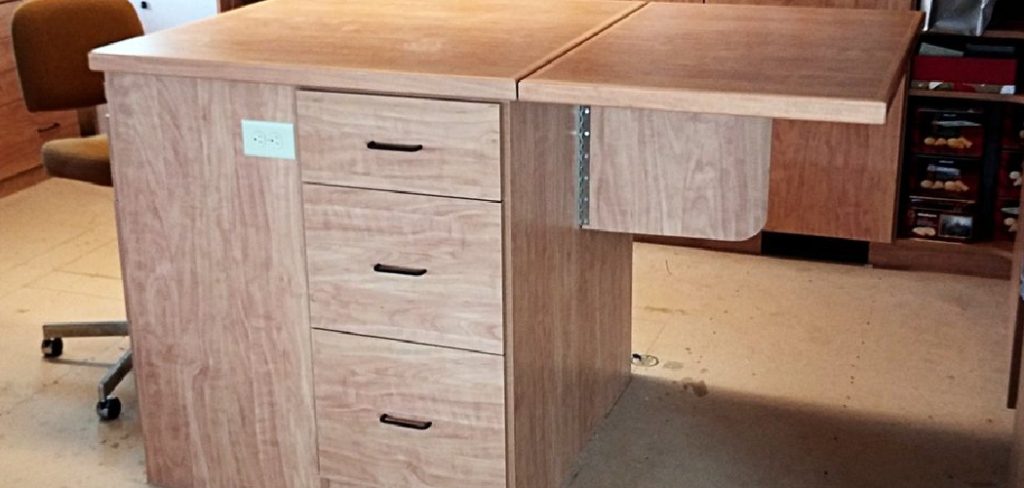
Building your own furniture is one of the most rewarding projects you can take on. Creating a desk with drawers from scratch might seem daunting, but it is entirely possible with the right plan.
A custom desk gives you the exact workspace you need, tailored to your room and your personal style. You do not need to be a master carpenter to achieve great results. With basic tools, patience, and this comprehensive guide on how to build desk with drawers, you can craft a beautiful and functional piece of furniture.
Whether you are setting up a home office, a study corner for your kids, or a dedicated gaming setup, a homemade desk with integrated storage will serve you well for years. Grab your tape measure and get ready to transform simple wood into a stunning, practical workspace.
What Will You Need?
Before you make your first cut, gather all your materials and tools. Having everything on hand makes the process smooth and enjoyable.
Materials:
- 3/4-inch hardwood plywood (for the desktop, cabinet sides, and drawer boxes)
- 1/2-inch plywood (for drawer bottoms)
- 1×2 and 1×3 pine or edge banding (to cover raw plywood edges)
- Drawer slides (bottom-mount or side-mount, depending on preference)
- Drawer pulls or knobs
- 1 1/4-inch pocket hole screws
- 1 1/4-inch wood screws and 5/8-inch brad nails
- High-quality wood glue
- Wood filler
- Sandpaper (120, 150, and 220 grit)
- Paint, wood stain, and a protective topcoat (like polyurethane)
Tools:
- Circular saw, or table saw (for long straight cuts)
- Miter saw (for cutting trim and face frames)
- Power drill and driver
- Pocket hole jig (essential for strong, hidden joints)
- Random orbital sander
- Tape measure, speed square, and a long straight edge
- Clamps (at least two long bar clamps and a few right-angle clamps)
- Safety glasses and hearing protection
10 Easy Steps on How to Build Desk With Drawers
Step 1: Planning and Measuring
Every great build starts with a solid plan. Begin by measuring the space where your desk will live. Determine the ideal height, width, and depth for your workflow. Standard desks sit about 29 to 30 inches off the floor. Sketch out your design on paper, noting the dimensions of the drawer cabinets on either side and the space you need for your legs in the middle. Create a comprehensive cut list based on these measurements.
This list will guide your saw and ensure you buy exactly the right amount of wood. Double-check all your measurements before you buy your lumber. Taking the time to visualize the final product now will save you from making frustrating and expensive mistakes later. Planning is the foundation of the entire project, so do not rush this critical phase.

Step 2: Cutting the Wood
With your cut list in hand, it is time to break down your plywood and solid wood boards. If you are using full sheets of plywood, lay them flat on a foam insulation board on the floor and use a circular saw with a straight-edge guide. This method is much safer and easier than wrestling heavy sheets onto a table saw.
Cut the large pieces first: the desktop, the side panels for the drawer cabinets, and the bottom panels. Next, cut the smaller pieces for the drawer boxes and the trim. Label every piece with a pencil as soon as you cut it, so you do not get confused later. Accuracy is everything here. Even a cut that is off by an eighth of an inch can cause your drawers to stick or your desk to wobble. Work slowly, measure twice, and cut once.
Step 3: Drilling the Pocket Holes
We are going to use pocket hole joinery to put this desk together. It is fast, incredibly strong, and hides the screws from view. Take all the pieces that will form the frame of your drawer cabinets and the structural supports for your desktop. Set your pocket hole jig for 3/4-inch thick material. Drill pocket holes along the edges of the cabinet bottom panels, the back support rails, and the top support stretchers.
You will also need pocket holes on the pieces that make up your drawer boxes. Think about where the screws will go and make sure the holes face the inside or the back of the desk so they remain hidden. Drilling all your pocket holes at once keeps your workflow efficient and prepares you for a smooth assembly process in the next step.
Step 4: Building the Drawer Cabinets
Now you get to see the desk start taking shape. Start by building the two drawer cabinets that will act as the base for your desk. Lay one side panel flat on your workbench. Apply a thin bead of wood glue along the edge of the bottom panel, stand it up against the side panel, and clamp it perfectly square.
Drive your pocket screws into the holes to secure the joint. Repeat this process to attach the other side panel, the back supports, and the top stretchers. Use a carpenter’s square constantly during this step. If these cabinets are not perfectly square, your drawers will never slide properly. Wipe away any excess glue immediately with a damp rag, as dried glue will ruin your finish later. Build the second cabinet identically to the first.
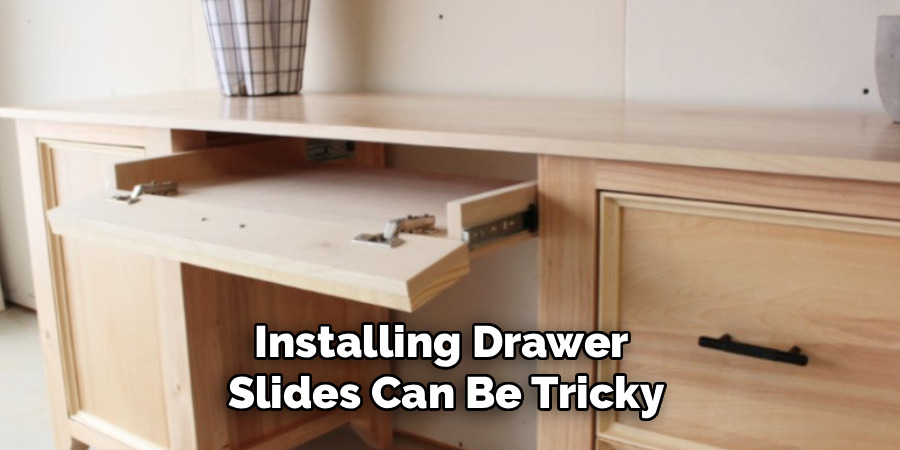
Step 5: Installing the Drawer Slides
Installing drawer slides can be tricky, but doing it now while the cabinets are open and accessible makes it much easier. Measure and mark the locations for your drawer slides on the inside of the cabinet panels. Use a scrap piece of wood cut to the exact height of your spacing to ensure the slides are perfectly level and consistent on both sides.
Separate the cabinet side of the slide from the drawer side. Secure the cabinet slides using the provided screws, making sure they are set back the correct distance from the front edge to allow for the thickness of your drawer fronts. Take your time here. The slides must be completely parallel and level. A slight angle will cause the drawer mechanism to bind, making your desk frustrating to use.
Step 6: Constructing the Drawer Boxes
With the slides in place inside the cabinets, you can build the drawer boxes to fit. The width of your drawer boxes must be precisely calculated based on the opening of your cabinet minus the thickness required by your drawer slides (usually about 1 inch total, or 1/2 inch per side). Assemble the four sides of each drawer box using wood glue and pocket hole screws.
Check that the box is square by measuring diagonally from corner to corner; the measurements should be exactly the same. Once the frame is square, run a bead of glue along the bottom edge and attach the 1/2-inch plywood bottom using 5/8-inch brad nails. A solid bottom ensures your drawers can hold heavy books and supplies without sagging. Attach the drawer side of the metal slides to the sides of your new boxes.
Step 7: Attaching the Drawer Fronts
Slide your newly built drawer boxes into the cabinets. They should glide smoothly. Now it is time to attach the decorative drawer fronts. Cut your drawer fronts from your remaining plywood or solid wood, leaving a 1/8-inch gap (reveal) all the way around each front. To attach them perfectly, use playing cards or thin plastic spacers to hold the drawer front in the exact right position while the drawer is closed.
Drive a couple of brad nails through the front to temporarily hold it in place. Then, carefully pull the drawer open and drive wood screws from the inside of the drawer box into the back of the drawer front for a permanent, secure hold. Drill holes for your chosen drawer pulls or knobs and attach the hardware. The cabinets are now fully functional and looking great.

Step 8: Preparing and Attaching the Desktop
The desktop is the centerpiece of your project. If you are using plywood, you will want to hide the ugly, layered edges. Cut strips of 1×2 pine or use iron-on edge banding to cover the exposed sides of your desktop plywood. Attach solid wood trim using glue and brad nails, making sure the top surface is perfectly flush with the plywood. Once the top is prepped, place it upside down on the floor. Turn your two-drawer cabinets upside down and position them on the desktop.
Measure carefully to ensure they are spaced evenly and aligned properly with the back and side edges. Use pocket screws through the top stretchers of the cabinets to pull the desktop tight against the base. Turn the whole desk right-side up. It is heavy, so get a friend to help you lift it.
Step 9: Sanding and Smoothing
This step requires patience, but it is the secret to a professional-looking piece of furniture. Fill all visible nail holes, gaps in your trim, and any exposed plywood voids with a high-quality, stainable wood filler. Let it dry completely. Grab your random orbital sander and start with 120-grit sandpaper to remove rough spots, glue residue, and excess wood filler. Work your way over the entire desk. Next, switch to 150-grit sandpaper, and finally finish with 220-grit for an incredibly smooth surface.
Always sand in the direction of the wood grain to avoid leaving ugly circular scratches. Pay special attention to the desktop surface and the front edges where your arms will rest. Run your hand over the wood; if you feel any rough patches, keep sanding. Vacuum all the dust away and wipe the desk with a tack cloth.
Step 10: Staining, Painting, and Finishing
The final step brings your desk to life. If you want to highlight the natural beauty of the wood, apply a wood conditioner followed by your favorite wood stain. Use a clean cloth to wipe the stain off, let it sit for a few minutes, and wipe off the excess. If you prefer a painted look, apply a coat of high-quality primer followed by two coats of durable enamel paint. Whatever color you choose, you must protect the surface, especially the desktop, which will see heavy daily use.
Apply at least three coats of a clear water-based or oil-based polyurethane. Sand very lightly with 400-grit sandpaper between coats to ensure a glass-like finish. Let the final coat cure for several days in a well-ventilated area before you set up your computer and start working.

Conclusion
How to build desk with drawers is a satisfying project that challenges your skills and rewards you with a highly functional piece of furniture.
By taking your time to plan, measuring precisely, and following these steps, you can create a workspace that fits your life perfectly. Do not let the complexity of drawers intimidate you; with patience and a careful approach to the hardware, anyone can achieve smooth-gliding results.
Remember to enjoy the process and take pride in your work. Once the final coat of finish dries, you will have a beautiful, durable desk that you built with your own hands.