

Motion sensor lights are everywhere nowadays, from suburban backyards to the alley beside the corner store. Ideal? No. But they’re a staple for a reason: nothing else is quite as effective at making an intruder think twice—or illuminating your hands when you’re fumbling with keys after dark. These fixtures snap on at the slightest movement, chasing away shadows and, supposedly, trimming your energy bill.
That’s the theory. In practice, it’s rarely so seamless. Owners often discover their supposedly “smart” lighting either wastes power by glaring long after the neighborhood cat runs off—or switches off so fast that you’re left cursing in the gloom while juggling groceries. If your sensor never seems to stay on for the right amount of time, well, you’re not alone. Fine-tuning these settings can seem fiddly, but it’s worth the effort, especially if you’d rather not shell out for unnecessary electricity, nor risk pointing a flashlight at your porch every night. In this guide on how to adjust motion sensor light time duration, we’ll explore the various factors that can affect your sensor’s performance and how to adjust them.
What is the Motion Sensor Light Time Duration?
It might sound overly technical, but all this “time duration” really means is: once something triggers the sensor, how long does the light stay on? There’s a timer inside, quietly counting seconds after it first blinks to life. If nothing else moves, the countdown runs out, and out go the lights—unless your model’s on the blink, which sometimes happens.
Most new units ship with an adjustable dial or switch letting you pick anywhere from a fleeting burst of illumination to several minutes of steady shine. (Though, if you’re using a relic from the last century, you may have fewer choices.)
Why Adjust the Time Setting?
You’d assume manufacturers would set the timer just right. They never do. Some lights stubbornly burn for ten minutes if a leaf dares drift past, gobbling up electricity with admirable persistence. Others snap off after ten seconds, punishing the slow-footed and easily distracted.
Neither scenario feels especially thoughtful. By fiddling with that timer, you might save a few bucks, keep the front step safely lit, or at the very least stop your neighbors’ pets from flooding your driveway with light every two minutes.
Types of Motion Sensor Lights
Shopping for motion lights? Expect all sorts of jargon. Some models use “active” sensors, meaning they shoot out faint radar or infrared waves and look for something—anything—bouncing them back. The usual go-to for homes, though, is the Passive Infrared (PIR) sensor. These pick up changes in body heat, which mostly means people and sometimes larger animals, not gusts of wind or every car driving by.
Others blend both approaches into one sensor, a tactic that, on paper, ought to reduce nuisance triggers (your mileage may vary). You’ll want to check what technology your own fixture uses—it may affect how easy it is to adjust, and how often it mistakes the neighbor’s kid for an intruder.
Tools You May Need to Install
There are a variety of tools and resources available to assist with the installation and setup of your outdoor motion sensor light. These may include:
- A ladder or scaffolding for reaching high areas
- Basic hand tools such as a screwdriver, pliers, and wire strippers
- Electrical tape or wire nuts for connecting wires
- A voltage tester to ensure power is off before making connections
- Silicone caulk or sealant to keep out moisture and protect electrical connections
- A drill and appropriate bits for mounting the fixture on walls or other surfaces
Safety Precautions Before Adjusting
If you ignore every other warning here, remember this: always shut off the power first. Seriously. A surprising number of people assume a bit of plastic protects them, only for a loose wire or soggy weather seal to prove otherwise. Locate your breaker panel and kill the current to the relevant fixture, then flip the switch just to check. Take extra care with your ladder placement, too—rushing is a common cause of accidents. Shoes with decent grip help, especially if you’re working outside on damp ground. And if you just turned off the light, pause for a moment; those bulbs, especially older ones, hold heat like a frying pan.
6 Simple Step-By-Step Guidelines on How to Adjust Motion Sensor Light Time Duration
Step 1: Turn Off the Power Supply
Let’s not tempt fate. Head to your home’s breaker box and trip whatever switch controls your exterior lights; labels are unreliable, so double-check by flicking the main light switch inside. Power safely off? Good. Even a minor electrical zap isn’t worth taking chances, and weathering can sometimes leave internal wires exposed, even if everything looks fine on the outside.
Step 2: Safely Access the Fixture
Set your ladder on a solid bit of ground below the sensor. Pushing your luck by stretching sideways is a classic way to bruise a rib. If the lawn’s bumpy, reposition and don’t settle for “good enough.” When you reach the fixture, it doesn’t hurt to quickly scan for missing screws, bird nests wedged beside the wires, or any other surprise that might explain why the light seems “off.”
Step 3: Locate the Adjustment Dials
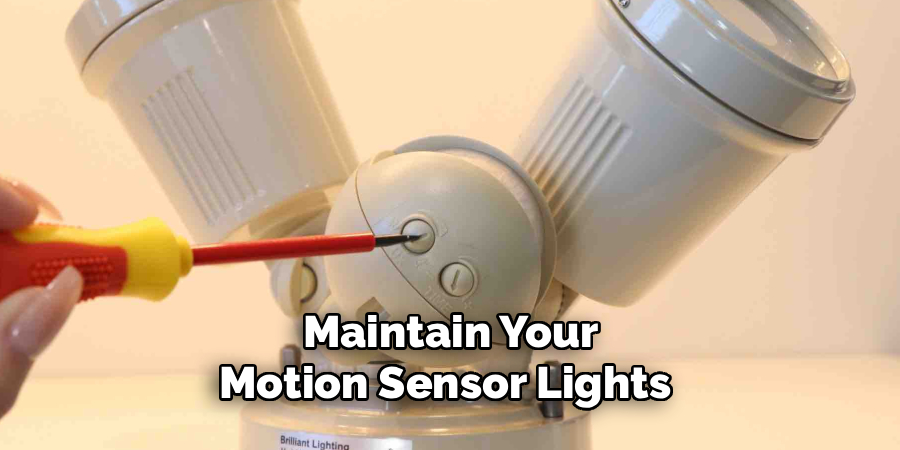
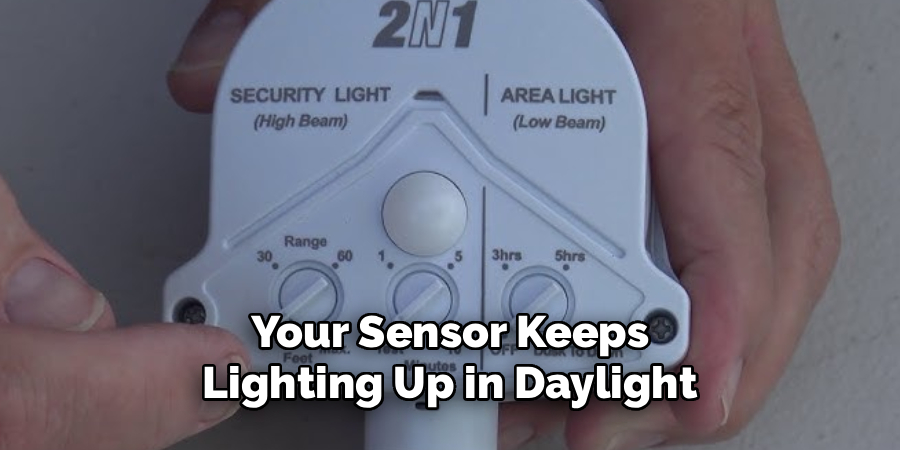
Most fixtures tuck their dials out of sight—typically underneath or to one side. Look for rubber or plastic flaps; it’s not uncommon for these covers to pop off in your hand, so set them somewhere safe. The dial you’re after is likely tagged “Time,” though you’ll probably spot others like “Sens” or “Lux.” Make a mental note of each while you’re here.
Step 4: Adjust the Time Dial
Use your screwdriver gently—sensor dials are fragile, and a heavy hand can strip the plastic inside. Some dials make your job easy with numbers or setting notches: “Test,” “1 Minute,” “5,” “10,” and so on. With others, it’s more guesswork. Turning clockwise usually means a longer duration, but check your manual or look for arrows if it’s unclear. If you’re wavering, aim for a middle ground—three or five minutes covers most porches or drive paths without burning extra energy.
Step 5: Restore Power and Run a Test
Once you’re happy with your first attempt, climb down safely and flip the breaker back on. Turn on the light’s wall switch inside, then walk in front of the sensor to trip it. Let your watch—or your phone’s timer—run until the light blinks out. If it’s wildly too short or lingers annoyingly, you’ll have to repeat the process: shut off the power, tweak the dial, and try again. A few iterations usually do the trick, although perfection is elusive.
Step 6: Secure the Housing and Clean Up
Almost done. Climb back up to seal the rubber or plastic cover over the adjustment dials; don’t skip this, since moisture is a short-circuit’s best friend. Realign the sensor’s angle if it looks off—you may have nudged it by accident. Gather your tools, collapse the ladder, and stash everything away until next time. Hopefully, you won’t need them again soon.
Following these steps on how to adjust motion sensor light time duration, you should now have a properly functioning sensor light that meets your needs. It’s important to periodically check and maintain your motion sensor lights to ensure they continue to work effectively.
Common Problems and Fixes
Occasionally, these things act up no matter how careful you are. If the light refuses to turn off, the sensitivity’s probably maxed out, picking up every distant car or breeze. Try dialing it back. Lights refusing to turn on at all? Start with the breaker, then try swapping bulbs.
Sometimes, the “Lux” setting is the issue—it controls how dark it must be before the sensor activates. If it’s switched to daytime mode, nothing will happen at night. It’s more common than you’d think.
Outdoor Motion Sensor Tips
Placement is, honestly, most of the battle. Sensors work best about six to ten feet up and angled to catch movement in the right spot—not staring into the sun, not facing vents belching warm air, definitely not trained on traffic.
Debris and dirt can easily cover the window, so give it a quick wipe with a damp cloth now and then. Neglect this, and don’t be surprised if your light gets fickle.
Common Mistakes to Avoid
A lot of headaches stem from over-tightening or using the wrong tool entirely. Forcing a tiny dial with a butchered screwdriver can leave the inner workings stripped beyond repair. People also routinely leave test mode switched on by accident; when that happens, the timer shrinks to just seconds, regardless of your setting.
High sensitivity settings combined with a household pet spell endless triggers through the night. It’s a simple oversight, yet surprisingly common.
Maintenance Tips
Routine checks are the best way to avoid unwanted darkness—look for signs of rust, leaking seals, or bulging bulbs every few months. Fill gaps with outdoor silicone sealant to keep the weather out. Old bulbs become unreliable long before they fully burn out, so swap them ahead of time.
During winter, a little snow brushed off the housing can fend off ice buildup (and the mysterious malfunctions that follow).
Frequently Asked Questions
Q1: Can I Bypass The Motion Sensor To Keep The Light On?
Yes—at least on most modern fixtures. Flip your wall switch off and then on quickly (within two seconds); this usually engages manual override mode, keeping the light on until the next morning. After that, the sensor tends to reset itself.
Q2: Why Does My Light Turn On During The Day?
If your sensor keeps lighting up in daylight, the “Lux” setting is probably to blame. This little dial tells the unit how dark it should be before it triggers. Turn it toward the “moon” or night icon—sometimes just a half-turn fixes the issue—, so it only operates at dusk and beyond.
Q3: How Long Should I Set My Motion Sensor Timer For?
There’s no single answer here. For front porches where you just need to get in the door, one to two minutes usually suffices. Driveways or spaces where you’re coming and going, carrying bags or wrangling trash, tend to benefit from three to five minutes. Tailor the setting to your routine; experiment until you stop noticing the light entirely—that’s ideally how it should work.
Making the Most of Your Motion Lighting
Fiddling with motion sensor timers isn’t glamorous. Yet, getting it “just right” can make a big difference in your nightly routine and utility statement. Armed with a bit of knowledge and willingness to tinker, anyone can fine-tune these gadgets to fit their home.
Test, adjust, and then forget about it. That’s the true mark of a well-set sensor light. Thanks for reading this guide on how to adjust motion sensor light time duration.
