

Taking apart an office chair might seem like a tough job at first glance. You look at the heavy base, the levers, and the gas cylinder, and wonder where to even begin.
People need to dismantle their chairs for many reasons. You might be moving to a new apartment and need to save space in the moving truck. Perhaps a specific part, like the gas lift cylinder or a broken wheel caster, needs a quick replacement to get your seat feeling brand new again. Or maybe your chair has simply reached the end of its life, and you want to recycle the metal and plastic parts properly.
Whatever your reason, this guide on how to disassemble office chair walks you through the entire process from top to bottom.
What Will You Need?
Before you begin turning screws and pulling parts, gather the right tools for the job. Having these items close by saves time and prevents frustration.
- Screwdrivers: You need both a flathead and a Phillips head screwdriver for the armrests, backrest, and mechanism casing.
- Allen Wrenches (Hex Keys): Most modern office chairs use hex screws to hold the main body together. Keep a standard set handy.
- Rubber Mallet: This is essential for knocking loose the gas cylinder and base without damaging the metal or plastic.
- Pipe Wrench: A large pipe wrench helps grip and twist the stubborn gas cylinder if the mallet does not work.
- Penetrating Oil (WD-40): A quick spray loosens tight, rusted, or friction-locked joints.
- Safety Gloves: Heavy-duty work gloves protect your hands from sharp metal edges and grease.
- An Old Towel or Blanket: Lay this on the floor to protect your workspace and prevent the chair parts from scratching your floors.
- Small Bags: Plastic ziplock bags keep your screws, bolts, and washers organized so you do not lose them.
10 Easy Steps on How to Disassemble Office Chair
Step 1: Prepare Your Workspace and Gather Your Tools
The first step to a successful disassembly is setting up a proper workspace. Find a flat, open area in your home or garage where you have plenty of room to move around. Lay down an old blanket, towel, or a large piece of cardboard on the floor. This protective layer prevents heavy metal parts from scratching your hardwood or leaving grease stains on your carpet. Bring all your gathered tools to the workspace and place them within arm’s reach.
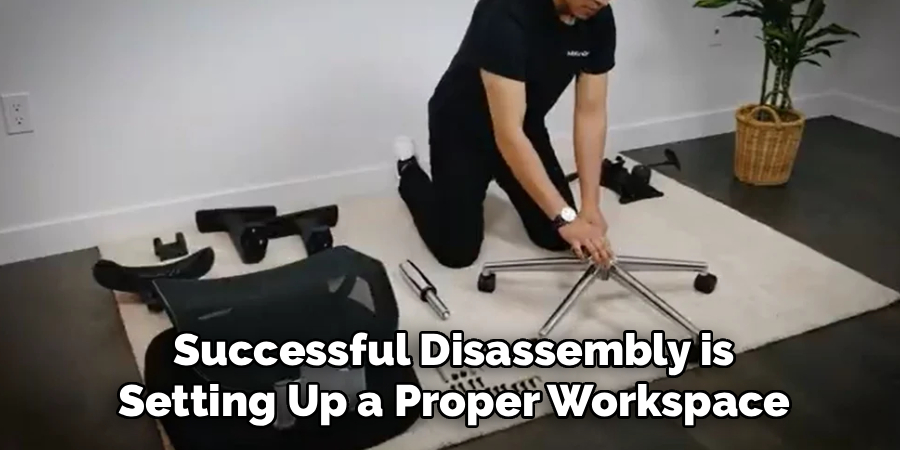
Have your small ziplock bags ready and label them with a marker so you know exactly where the armrest screws and backrest screws belong. Put on your safety gloves to protect your hands from grease and sharp edges. Doing this prep work ensures you will not have to stop halfway through the job to go hunting for a missing Allen wrench or a dropped washer.
Step 2: Remove the Headrest and Armrests
Start dismantling from the top down to make the chair easier to handle. If your chair features an attached headrest, look for the screws at the base of the neck support. Use the appropriate screwdriver or Allen wrench to remove them, pull the headrest away, and put the screws in a labeled bag.
Next, tackle the armrests. Depending on the design, the armrests might attach to the bottom of the seat cushion or connect the seat pan to the backrest. Turn the chair on its side if necessary to reach underneath. Unscrew the bolts holding the armrests in place. Support the armrest with one hand as you remove the final screw so it does not fall and crack. Place the arms off to the side and securely store their specific hardware. Removing these bulky side pieces instantly makes the chair much lighter and easier to maneuver.
Step 3: Detach the Backrest from the Seat
With the arms out of the way, your next goal is to separate the backrest from the main seat cushion. Most backrests connect to the seat through a thick metal bracket or bar that slides into the bottom mechanism. Look for a tension knob or a series of heavy bolts holding this metal bar in place.
If it uses bolts, take your Allen wrench and carefully loosen each one. Once the bolts are out, hold the base of the chair steady and pull the backrest straight up and out of its slot. Some ergonomic chairs have a flexible cable connecting the lumbar support to the base controls. If you see a thin cable, trace it to its connection point and gently unclip it before pulling the backrest completely free. Set the backrest aside safely.
Step 4: Flip the Chair and Remove the Wheel Casters
Now that the top half of the chair is gone, you are left with the seat cushion, the mechanical base, the gas cylinder, and the legs. Grab the seat cushion and flip the entire assembly upside down so the wheels point toward the ceiling. Rest the seat flat on your protective blanket. The wheel casters simply pop into the metal or plastic star base using friction rings. Grip one wheel firmly with both hands and pull straight up.
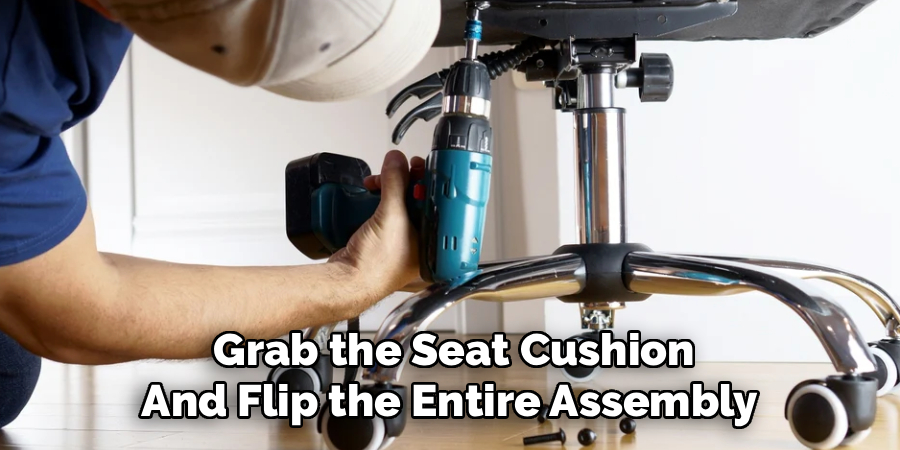
It should pop right out with a little bit of force. If a wheel feels completely stuck due to dirt or rust, spray a tiny bit of penetrating oil where the stem meets the base. Wait a few minutes, then wrap a rag around the caster and pry it upward with the flathead screwdriver. Repeat this process until all five wheels are completely removed.
Step 5: Lubricate the Cylinder Joints
The gas lift cylinder connects the star base to the seat mechanism. Over time, the weight of the person sitting on the chair wedges this metal cylinder tightly into the base and the seat plate. This friction lock is incredibly strong. Before you try to hammer anything apart, use your penetrating oil. Spray WD-40 generously around the top joint where the cylinder meets the seat mechanism.
Then, spray it around the bottom joint where the cylinder sits inside the five-legged base. Let the oil sit and soak into the tight metal crevices for at least ten to fifteen minutes. The oil breaks down dirt and rust, breaking the seal. Skipping this step usually results in heavy frustration, as dry friction-locked parts rarely budge even with heavy hammering.
Step 6: Knock the Star Base Loose from the Cylinder
After the oil has had time to work its magic, it is time to remove the five-legged star base. Keep the chair upside down. Hold one of the chair legs with your non-dominant hand to stabilize the base. Take your rubber mallet in your other hand. Firmly tap the bottom rim of the star base, right next to where the cylinder slides through the center.
Do not hit the silver cylinder itself. Tap in a circular motion around the center hole. The vibration and downward force will gradually break the friction lock. If you only have a metal hammer, make sure to place a thick block of wood over the base before hitting it so you do not shatter the plastic or dent the metal. After several firm strikes, the heavy star base will slide off the cylinder.
Step 7: Apply the Pipe Wrench to the Stuck Cylinder
Sometimes the mallet method is not quite enough to separate the top of the cylinder from the metal seat mechanism. If the cylinder remains completely stuck to the seat pan after trying to tap it out, you need to use a large pipe wrench. Clamp the jaws of the pipe wrench tightly onto the thickest part of the gas cylinder.
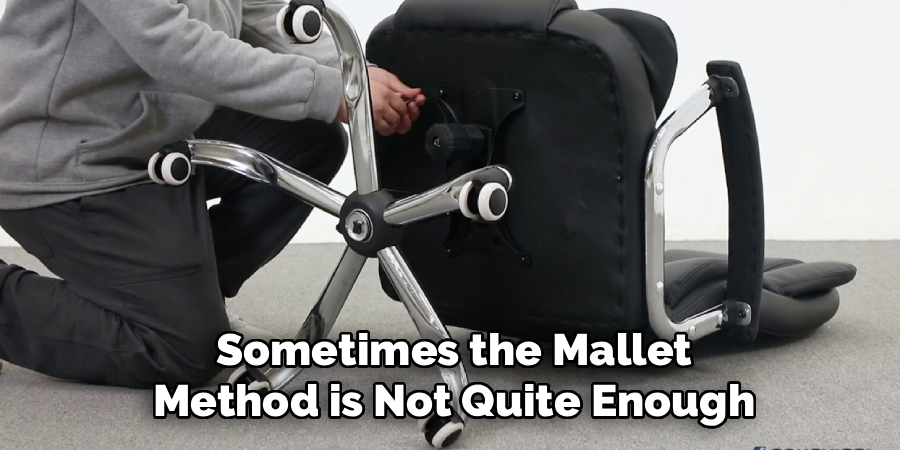
Turn the wrench forcefully to twist the cylinder within its socket. Breaking that rotational seal is the key to defeating a friction lock. Once the cylinder spins slightly in place, you know the seal is broken. From there, you can easily pull the cylinder straight out of the seat mechanism. Be careful handling the cylinder, as it contains compressed gas and grease.
Step 8: Remove the Seat Mechanism Plate
You now have the seat cushion alone, with the heavy metal control mechanism attached to the bottom. This plate holds the levers for height adjustment and tilt control. Use a screwdriver or an Allen wrench to remove the four large bolts holding the metal plate to the wooden or plastic bottom of the seat pan.
These bolts are usually tight, so use steady pressure to break them loose. Keep one hand pressed against the metal plate as you remove the last bolt. The plate is surprisingly heavy and can pinch your fingers or drop onto your toes if it falls unexpectedly. Once free, store the four large bolts in a separate bag. Your seat cushion is now completely stripped of its mechanical hardware.
Step 9: Detach the Plastic Shrouds and Covers
Many office chairs feature decorative plastic covers over the mechanical plate or the backrest bar to hide the ugly metal parts. If you are doing a deep clean or recycling the chair, you should remove these shrouds. Look closely at the plastic pieces for hidden Phillips head screws or small plastic tabs.
Use your flathead screwdriver to gently pry apart any tabs. Work slowly and carefully around the edges. Applying too much force will instantly snap the brittle plastic. By removing these covers, you expose the raw metal underneath, making it much easier to recycle the materials or access the inner springs if you plan on repairing the tilt tension system.
Step 10: Clean, Organize, and Store the Components
The final step brings the entire disassembly process together. You now have a pile of wheels, a base, a cylinder, a seat pan, a backrest, armrests, and a mechanical plate. Take a damp microfiber cloth and wipe down every individual piece. Remove the heavy grease from the ends of the gas cylinder and wipe the dust off the base legs.
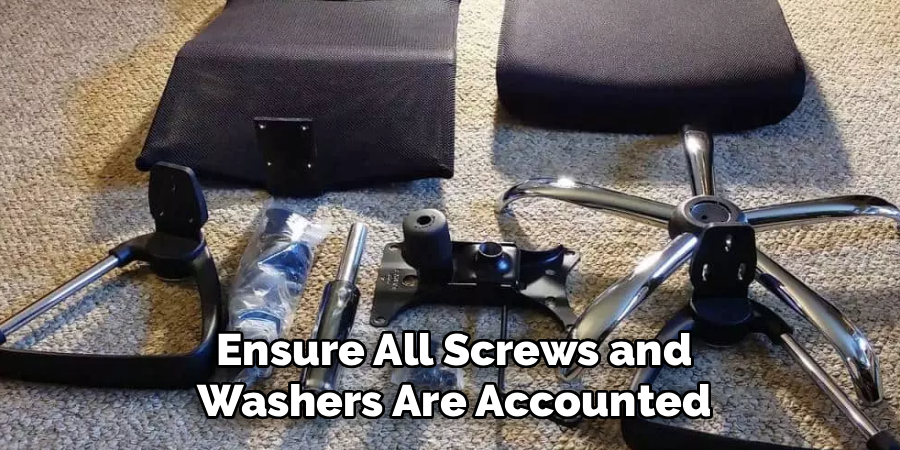
Check your labeled ziplock bags to ensure all screws and washers are accounted for. If you are putting the chair in storage or preparing it for a move, stack the seat cushion and backrest together, and place the smaller parts into a sturdy cardboard box. Tape your bags of hardware directly to the larger parts they belong to. Your office chair is now safely fully disassembled and ready for its next journey.
Conclusion
How to disassemble office chair does not have to be an intimidating task. By understanding how the friction locks work and having the right tools ready, you can break down the bulkiest chair in just a few minutes.
Remember to take your time, let the penetrating oil do the hard work, and keep your screws organized as you go. Whether you are moving across the country, swapping out a sinking gas cylinder, or preparing old furniture for the recycling center, these steps will help you get the job done safely.
With a little bit of patience, you will master the disassembly process and keep your workspace manageable.

About
Alexis Kerr is a distinguished figure in the world of professional workspace optimization, with a decade of expertise creating innovative and ergonomic office environments. Her professional focus lies in merging organizational psychology with modern spatial design, fostering office setups that are both high-performing and employee-centric. As the lead author for Deskvity, Alexis Kerr delves into the art and science of corporate aesthetics and functionality, inspiring office managers and remote professionals alike.
Education Cornell University
(Ithaca, New York) Bachelor of Science in Design and Environmental Analysis Focus on human factors, workplace strategy, and sustainable interior environments. Gained extensive experience in how physical space influences productivity and mental clarity.
Savannah College of Art and Design (SCAD)
(Savannah, Georgia) Master of Fine Arts in Interior Design Specialized in commercial workspace solutions with a focus on blending digital integration with physical comfort. Participated in high-level industry projects to refine the balance between corporate branding and architectural utility.
Publications and Impact
In Deskvity, Alexis Kerr shares her insights on modern workspace trends, acoustic management, and strategies for efficient layout planning. Her writing bridges the gap between high-level architectural theory and practical day-to-day office needs, making it a must-read for both facility directors and individual professionals looking to elevate their work environment.