

Welcome, fellow home gardeners! We spend countless joyful hours in the greenhouse listening to fantastic botanical podcasts or relaxing music while transplanting delicate spring seedlings. However, tossing your expensive audio gear onto a dirty, soil-covered wooden potting bench guarantees ruined ear cushions and clogged electronic charging ports. You need a dedicated, safe spot to hang your audio equipment away from the damp soil and heavy watering cans.
If you are wondering exactly how to make a headphone stand using spare backyard materials, you have found the perfect beginner-friendly guide. You absolutely do not need an advanced carpentry degree or an expensive workshop full of heavy machinery to build a functional, beautiful resting spot for your electronics. By utilizing fallen branches, leftover landscaping wood, and basic hand tools, you can easily create a gorgeous rustic display piece. Let us grab our gardening gloves, select some beautiful leftover timber, and build a wonderful organizational accessory for your peaceful backyard workspace today!

Step-by-Step Guide: How to Make a Headphone Stand
Step 1: Gather Your Rustic Garden Materials
Before making any cuts, you must scour your backyard for the perfect structural pieces. Look for a thick, heavy slice of a fallen log to serve as a completely stable, tip-proof base. Next, find a relatively straight, sturdy branch about twelve inches long for the main vertical supporting post. Finally, locate a slightly curved, smooth piece of wood for the top horizontal resting bar.
Gathering these organic, natural materials directly from your own landscape completely eliminates expensive hardware store trips. Selecting hardwood varieties like oak or maple guarantees your finished project remains highly durable and incredibly beautiful for many gardening seasons to come.
Step 2: Clean and Prepare the Wood
Once you bring your chosen branches inside the potting shed, you must clean them thoroughly to remove stubborn garden dirt and hidden outdoor pests. Take a stiff bristle brush and scrub the bark aggressively to knock away any loose organic debris or lingering moss. You can choose to peel the bark completely off for a smooth, modern look, or leave it intact to maintain that gorgeous rustic greenhouse aesthetic. Allow your damp branches to dry completely inside a warm room for several days. Working with completely dry timber prevents the wood from cracking or splitting later when you start driving screws into the base.
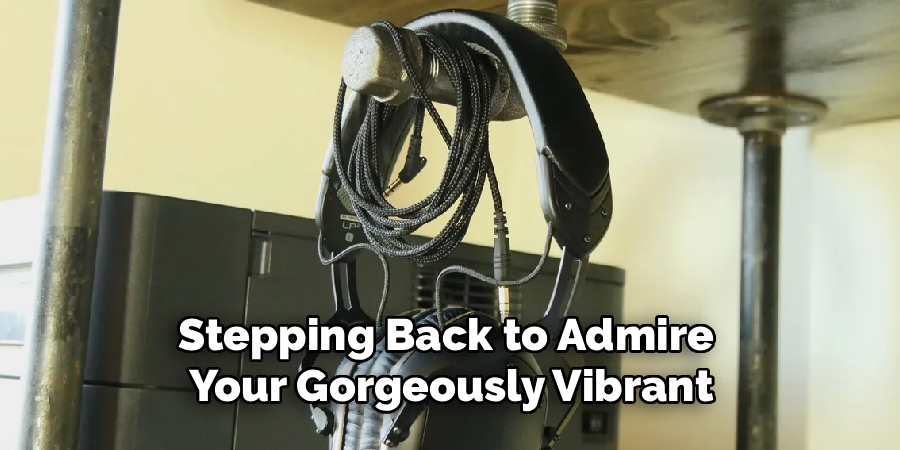
Step 3: Cut the Main Vertical Branch
With your natural materials perfectly dry and clean, you must cut your main supporting post to the correct functional height. Grab a standard hand saw and cut the straight branch so it measures roughly ten to twelve inches tall. This specific height provides plenty of vertical clearance, ensuring your audio wires will not awkwardly bend or drag against the wooden base below. You must ensure both the top and bottom cuts remain completely flat and perfectly level. Taking your time to cut these ends straight guarantees the entire assembled structure will stand proudly upright without leaning dangerously to one side.
Step 4: Create the Top Resting Piece
When learning how to make a headphone stand properly, designing the top horizontal resting bar requires the most attention. You must cut a smooth, curved piece of wood roughly four inches long to hold your expensive audio gear. The top surface needs a gentle curve that mimics the natural shape of a human head. This specific curved design physically supports the padded headband evenly, preventing permanent, ugly indentations in the soft memory foam. Use a heavy piece of coarse sandpaper to completely round off any sharp, jagged edges left behind by your hand saw during the initial cutting process.
Step 5: Drill the Connecting Holes
Connecting thick, round branches securely requires creating proper pilot holes to prevent the dry wood from aggressively splitting apart. Place your heavy log slice on your workbench and drill a single hole directly through the center. Next, drill a matching hole straight into the bottom center of your vertical post. You must perform this exact same drilling process to connect the top resting bar to the upper end of the vertical post. Using a power drill creates a clean, focused channel for your metal screws to follow. Taking this crucial preparatory step ensures an incredibly tight, permanent physical bond between your rustic pieces.
Step 6: Assemble the Wooden Pieces
Now that you have perfect pilot holes, you can confidently join your natural garden materials together into a single, sturdy structure. Squeeze a small drop of heavy-duty wood glue directly into the center hole on your base piece. Drive a long wood screw up through the bottom of the base and directly into the waiting vertical post. Tighten the metal screw firmly until the vertical branch sits completely flush against the flat wooden base. Repeat this exact gluing and screwing process to attach your curved horizontal bar to the top of the post. Wipe away any excess wet glue immediately using a damp cloth.

Step 7: Sand the Edges Smoothly
Your assembled structure might look fantastic, but you must ensure the natural wood does not scratch your delicate electronics. Grab a block of fine-grit sandpaper and meticulously rub every single exposed wooden surface. Pay very close attention to the top curved resting bar, eliminating any rough patches, sharp splinters, or jagged bark edges.
Your bare fingers should glide effortlessly across the timber without catching on anything sharp. Creating a perfectly smooth physical texture protects your soft leather ear pads from accidental tears. This delicate finishing work elevates your simple garden craft into a truly professional, high-quality organizational accessory.
Step 8: Apply a Protective Finish
The final rewarding step involves sealing the raw timber to protect it from the humid, damp environment of your active greenhouse. Pour a small amount of natural linseed oil, tung oil, or melted beeswax onto a clean cotton rag. Rub the rich oil deeply into the wood grain, allowing the thirsty timber to absorb the protective moisture completely. This natural finish heavily highlights the beautiful, organic patterns hidden inside the wood while providing a fantastic waterproof barrier against accidental garden spills. Allow the oil to dry entirely overnight before hanging your expensive audio equipment safely on your beautiful new creation.
Frequently Asked Question
What Type Of Wood Works Best For This Project?
- Hardwoods generally provide the absolute best structural stability for building custom organizational accessories.
- Look for fallen branches from sturdy oak, maple, walnut, or heavy cherry trees resting around your property.
- You should actively avoid incredibly soft woods like pine or rotting organic timber, as they frequently split during the drilling phase.
- Always ensure the wood you collect feels heavy, dense, and completely free of destructive tunneling insects.

Can I Use Wood Glue Instead Of Screws?
- Relying exclusively on standard liquid wood glue rarely provides enough structural strength to hold heavy branches upright.
- The uneven, organic surfaces of natural backyard branches do not bond perfectly without intense physical clamping pressure.
- We strongly recommend using long metal wood screws combined with a drop of glue for maximum security.
- If you absolutely hate the look of metal screws, you can utilize thick wooden dowels to seamlessly join the pieces together.
How Tall Should The Vertical Post Be?
- The ideal height depends entirely on the specific physical dimensions of your personal audio equipment.
- A vertical post measuring roughly ten to twelve inches tall accommodates almost every standard model available today.
- You want to leave at least two full inches of empty breathing room between the hanging ear cups and the flat wooden base.
- Providing this extra vertical clearance prevents thick charging cables from painfully bending or breaking against the solid table.
Do I Need Power Tools To Build This?
- You absolutely do not need an entire garage full of expensive power machinery to finish this rustic project beautifully.
- A simple manual hand saw easily cuts through standard backyard branches with just a little physical effort.
- A basic handheld drill helps create crucial pilot holes safely, but you can drive the screws manually using a standard screwdriver.
- Coarse sandpaper easily replaces noisy electric sanders, offering a quiet, peaceful crafting experience right at your garden bench.
Will Natural Wood Damage My Ear Cushions?
- Raw, unfinished wood definitely possesses the sharp potential to scratch or tear delicate leather memory foam cushions over time.
- This reality makes the meticulous sanding and smoothing phase absolutely critical to your overall project success.
- Applying a high-quality natural oil or soft beeswax finish drastically reduces friction between the timber and the soft fabric.
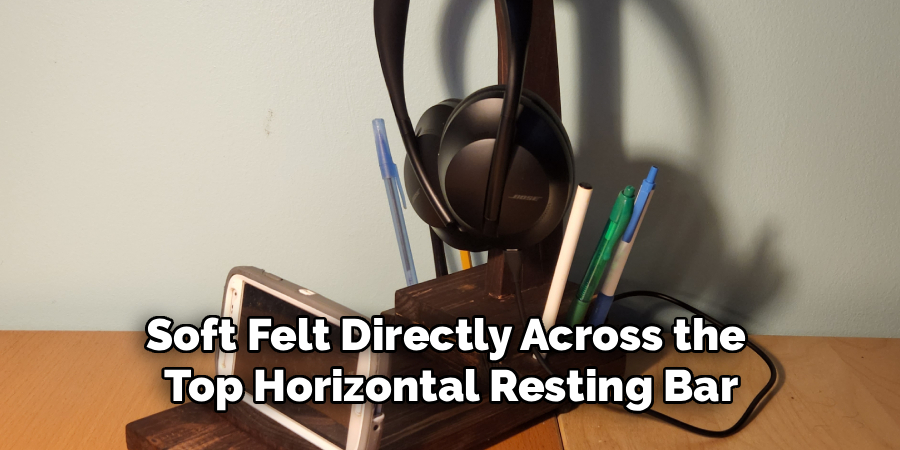
- If you feel overly concerned, you can easily glue a small strip of soft felt directly across the top horizontal resting bar.
Conclusion
Transforming fallen backyard branches into a highly functional organizational accessory serves as a wonderfully fulfilling weekend endeavor. By taking the crucial time to gather sturdy hardwoods, carefully sanding away sharp edges, and driving secure metal screws, you protect your valuable electronics from the messy hazards of your potting shed. You no longer have to worry about accidentally spilling liquid fertilizer onto your favorite listening devices while planning out your complex spring vegetable beds.
Understanding exactly how to make a headphone stand empowers you to build beautiful, highly practical items entirely from scratch. The wonderful sense of creative satisfaction you feel serves as a fantastic reward for your deliberate crafting efforts. Clear a safe, dry spot on your wooden workbench, apply that final coat of rich linseed oil, and hang your equipment proudly. Your thriving backyard garden and your newly upgraded, highly organized indoor workspace will absolutely inspire your very best horticultural work for many joyful seasons to come!
