

A blurry projector can ruin a movie night, weaken a classroom lesson, or make a business presentation hard to follow. The good news is that most blur problems come from simple causes, such as poor focus, wrong placement, dust on the lens, low resolution settings, or a screen that is not aligned well.
This guide explains how to fix blurry projector problems in a clear, beginner-friendly way. You do not need advanced technical skills to start. You only need patience, a few basic checks, and a safe setup.
Projector blur matters because it affects comfort, detail, and readability. Small text becomes hard to read, faces look soft, and images lose their sharp edges. By checking each possible cause in the right order, you can often restore a clean picture without replacing the projector or calling a technician.
Why Fixing A Blurry Projector Matters
Fixing a blurry projector improves image quality, reduces eye strain, and helps you get better value from your device. A sharp picture makes movies more enjoyable, presentations easier to understand, and gaming more responsive.
Blur can also point to setup problems that may shorten projector life. Poor ventilation, dirty lenses, wrong distance, and incorrect settings can all affect performance. When you solve the issue early, you protect both the projector and the viewing experience.
A clear image also saves time. Instead of guessing during every use, you can set up the projector correctly and enjoy stable, reliable results.
Step-By-Step Guide To How To Fix Blurry Projector
Step 1: Check The Lens Focus
Start with the most common cause: the focus setting. Most projectors have a focus ring around the lens or a focus control in the menu. Turn the focus slowly while looking at small text or a sharp edge on the screen.
Do not adjust it too quickly. A small movement can make a big difference. If your projector has auto focus, run the feature again and wait until it finishes. Auto focus can struggle if the screen is uneven, the room is too bright, or the projector is at a sharp angle.
Step 2: Clean The Projector Lens
Dust, fingerprints, and smudges on the lens can make the whole image look soft. Turn off the projector and let it cool before cleaning. Use a clean microfiber cloth made for lenses. Wipe gently in a circular motion without pressing hard.
Avoid paper towels, rough fabric, or household glass cleaners. These can scratch lens coatings or leave streaks. If you are learning how to fix blurry projector issues, cleaning the lens is one of the safest and fastest checks. A clear lens often improves sharpness right away.
Step 3: Adjust The Projector Distance
Every projector has a recommended throw distance. This means it needs to sit within a certain range from the screen to create a sharp image. If it is too close or too far away, the picture may look blurry even after you adjust the focus.
Move the projector slightly forward or backward and refocus after each change. Use the manual if you have it, or check the model’s throw ratio online. Short-throw, long-throw, and portable projectors all need different placement. Proper distance helps the lens project at its best.
Step 4: Align The Projector With The Screen
A projector should face the screen as straight as possible. If it sits too high, too low, or too far to one side, the image may stretch or blur at the edges. Keystone correction can help shape the image, but too much digital correction can reduce sharpness.
Place the projector on a stable, level surface. Aim the lens at the center of the screen. Then adjust the height and angle before using digital settings. Physical alignment usually gives better results than relying only on software correction. This step is especially important for text and detailed images.
Step 5: Review Resolution And Input Settings
A projector may look blurry if the source device sends the wrong resolution. For example, a laptop set to a low display resolution can make the projected image appear soft. Open your display settings and choose a resolution that matches the projector’s native resolution when possible.
Also check the aspect ratio. A stretched image can look unclear because it is being forced into the wrong shape. If you use an HDMI cable, make sure it is fully connected and not damaged. A good signal helps the projector show clean detail.
Step 6: Inspect The Screen Or Wall Surface
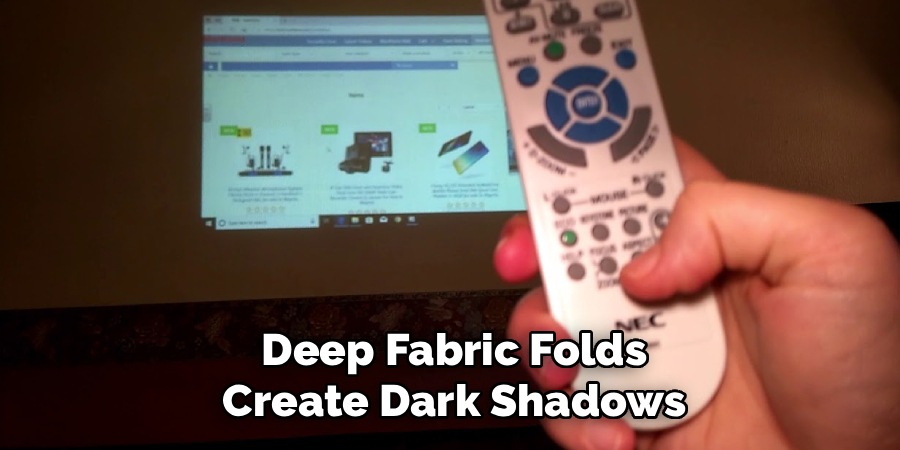
The surface you project onto affects image sharpness. A textured wall, glossy paint, uneven screen, or wrinkled fabric can scatter light and make the image look fuzzy. Even a good projector cannot create a crisp picture on a poor surface.
Use a smooth projector screen when possible. If you use a wall, choose a flat, light-colored area with minimal texture. Make sure the screen is tight, clean, and straight. When the surface is smooth and even, the projected image has clearer edges, better contrast, and more consistent focus.
Step 7: Check Brightness, Contrast, And Picture Modes
Picture settings can make a sharp image look washed out or unclear. Open the projector menu and test different picture modes, such as cinema, presentation, standard, or game. Some modes increase brightness but reduce fine detail, while others improve contrast.
Adjust brightness and contrast slowly. Too much brightness can make light areas look flat, and too much sharpness can create harsh outlines. If you still wonder how to fix blurry projector problems after focusing and cleaning, picture settings are a smart next step. Restoring default settings can also help if many changes were made.
Step 8: Look For Hardware Or Maintenance Problems
If the image stays blurry after basic adjustments, the projector may need maintenance or repair. Check the air vents and filters. Dust buildup can cause heat problems, and overheating can affect performance. Clean or replace filters according to the manual.
Also listen for unusual fan noise and look for warning lights. If the projector has been dropped, the lens or internal optics may be misaligned. Lamp-based projectors can also lose brightness as the lamp ages, which may make the picture seem dull and unclear. If these signs appear, professional service may be the safest choice.
Projector Lifespan Expectations
The lifespan of a projector depends on several factors, including the type of projector, usage patterns, and maintenance. Lamp-based projectors typically have a lifespan ranging from 2,000 to 5,000 hours for their lamps, but this can vary based on brightness settings and how frequently the projector is used.
LED projectors, on the other hand, often have significantly longer lifespans, with light sources lasting up to 20,000 hours or more. Laser projectors provide even greater durability, with lifespans exceeding 20,000 hours and consistent performance over time. To maximize a projector’s lifespan, regular cleaning, proper ventilation, and operating it within recommended guidelines are crucial.
Frequently Asked Questions
Why Is My Projector Blurry Even After Focusing?
Your projector may still be blurry because focus is only one part of image quality. The lens may be dirty, the projector may be too far from the screen, or the source resolution may not match the projector. Screen texture and strong keystone correction can also soften the image. Check each setup factor before assuming the projector is faulty.
Can A Dirty Lens Make A Projector Look Blurry?
Yes, a dirty lens can make the entire image look hazy, soft, or uneven. Dust, fingerprints, and cleaning streaks scatter light before it reaches the screen. Always turn the projector off and let it cool before cleaning. Use a microfiber lens cloth and gentle pressure. Avoid harsh cleaners unless the projector manual clearly says they are safe.
Does Keystone Correction Reduce Projector Sharpness?
Keystone correction can reduce sharpness because it digitally reshapes the image. This process may lower detail, especially around text and image edges. A small amount is usually fine, but heavy correction can make the picture look soft. For the clearest image, physically align the projector with the screen first, then use keystone only for minor adjustments.
What Is The Best Surface For A Clear Projector Image?
A smooth projector screen usually gives the clearest image. It reflects light evenly and helps maintain sharp edges, accurate color, and good contrast. A plain wall can work, but texture, glossy paint, bumps, and stains can reduce clarity. If you use a wall, choose a flat, clean, light-colored surface with as little texture as possible.
When Should I Get My Projector Repaired?
You should consider repair if the image remains blurry after cleaning the lens, adjusting focus, checking distance, improving alignment, and testing display settings. Warning lights, overheating, strange fan noise, internal dust, or blur on only one side of the image can point to hardware trouble. If the projector was dropped, internal lens alignment may need professional service.
Conclusion
A blurry projector is often easier to solve than it first appears. Start with simple fixes like adjusting focus, cleaning the lens, checking distance, and improving alignment. Then review the source resolution, screen surface, picture settings, and maintenance needs.
Taking a step-by-step approach saves time and helps you avoid unnecessary repairs. If the blur continues after careful setup, the projector may need professional inspection. Use this guide on how to fix blurry projector issues whenever your image looks soft, unclear, or hard to read.

About
Alexis Kerr is a distinguished figure in the world of professional workspace optimization, with a decade of expertise creating innovative and ergonomic office environments. Her professional focus lies in merging organizational psychology with modern spatial design, fostering office setups that are both high-performing and employee-centric. As the lead author for Deskvity, Alexis Kerr delves into the art and science of corporate aesthetics and functionality, inspiring office managers and remote professionals alike.
Education Cornell University
(Ithaca, New York) Bachelor of Science in Design and Environmental Analysis Focus on human factors, workplace strategy, and sustainable interior environments. Gained extensive experience in how physical space influences productivity and mental clarity.
Savannah College of Art and Design (SCAD)
(Savannah, Georgia) Master of Fine Arts in Interior Design Specialized in commercial workspace solutions with a focus on blending digital integration with physical comfort. Participated in high-level industry projects to refine the balance between corporate branding and architectural utility.
Publications and Impact
In Deskvity, Alexis Kerr shares her insights on modern workspace trends, acoustic management, and strategies for efficient layout planning. Her writing bridges the gap between high-level architectural theory and practical day-to-day office needs, making it a must-read for both facility directors and individual professionals looking to elevate their work environment.